7 Mise-en-scène II: Lighting and Color
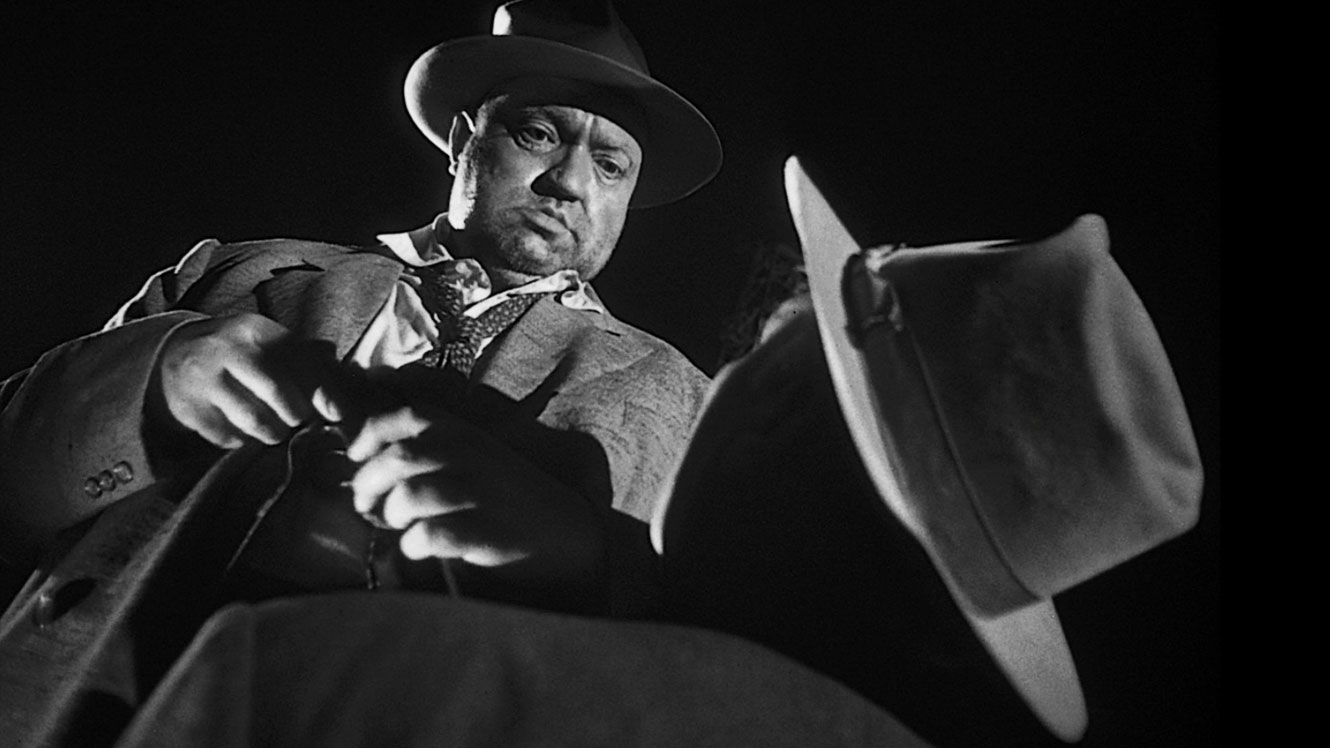
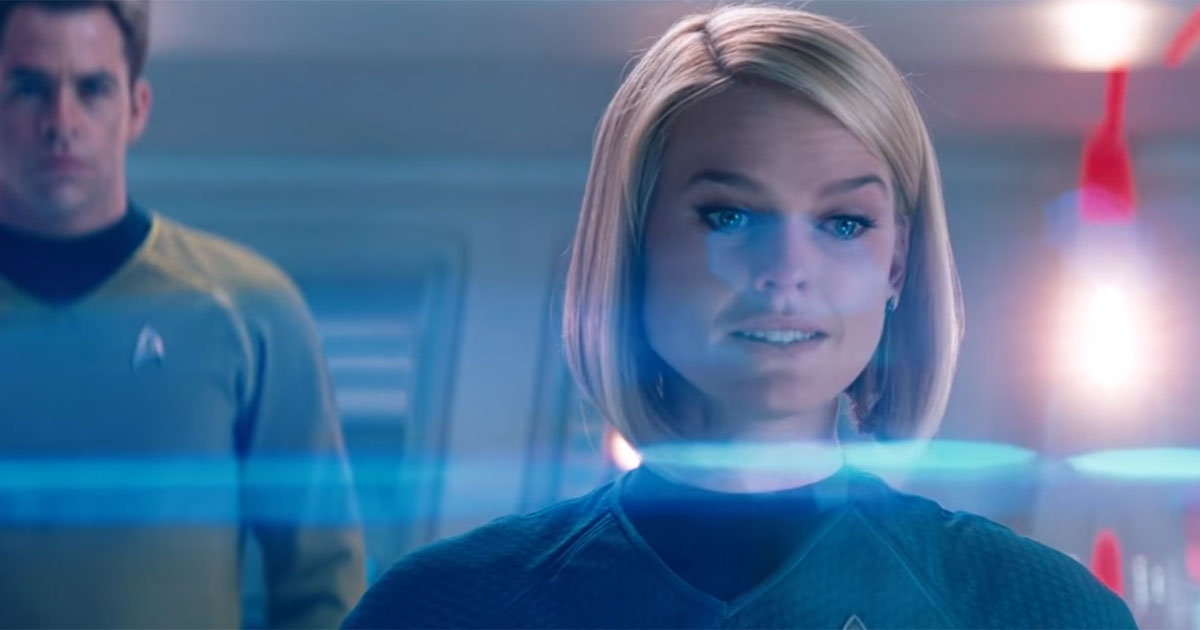
We all have language at hand to discuss the effect of lighting in a film. We might ask a roommate, for example, to close the blinds while watching Touch of Evil (dir. Orson Welles; 1959) because the movie is “so dark.” Or we might complain to a friend about the lens flares in Star Trek (dir. J. J. Abrams; 2009) because Abrams love of the technique is giving you headaches.
-

- Touch of Evil
-
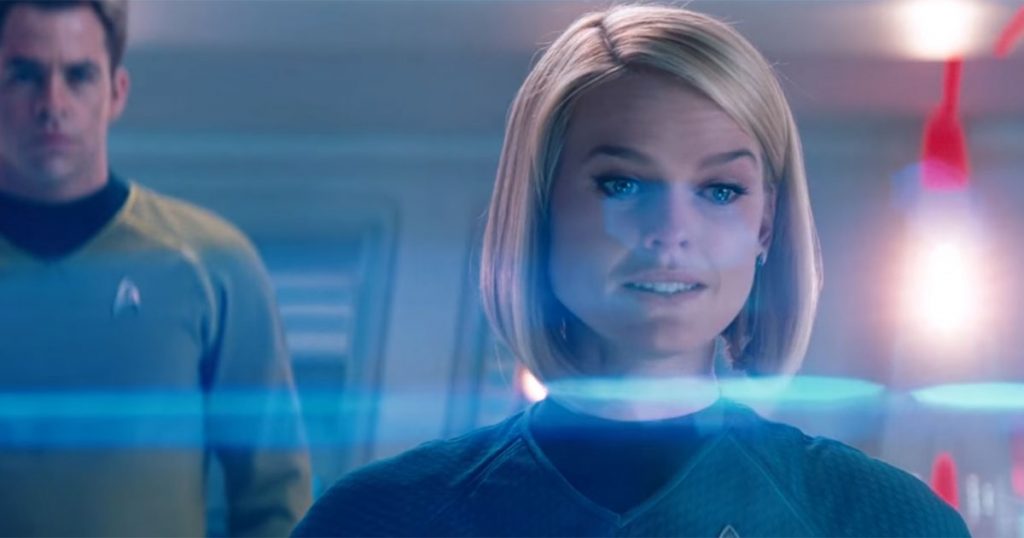
- Star Trek
And we have already begun using some of the technical language of lighting design in earlier discussions: high-key or low-key lighting, for example. This week we will dive into learning how to think about lighting design choices with more precision, but none of the technical language to follow undermines our instinctive reaction to the lighting of the film. After all, lighting is something we all already know deeply impacts our moods as human beings (never is this more clear than as we head towards winter when light will be in such short supply). We can be “blinded” by light, or “energized” by it. Its sudden absence can trigger primal fear, and its gradual amplification often inspires feelings of hope for the future. As much as trees and plants, we respond to light in highly sensitive—often deeply hard-wired—ways, and a good lighting designer in a film knows how to work with the director, production designer, and cinematographer to paint an emotional story with light and darkness.
Of course, lighting also serves more explicitly narrative functions, such as directing the viewer’s eye to an important object or event, or obscuring a detail that will only be revealed later. And in traditional character-driven narrative film, the lighting is almost always first and foremost focused around the main actors and their movements. This is why the cinematographer is intimately involved in discussions of lighting design, even as lighting is still part of the pre-production process and cinematography officially begins at the production stage. The cinematographer, or Director of Photography, needs to know how the actors and settings are going to be lit in order to make decisions about shutter speeds, camera movement, and (if using traditional film) film stock or (if shooting digitally) camera sensors and lens ISOs. We will talk about the work of the cinematographer and their team later, but one of the reasons lighting design is usually a late part of the production process is that lighting inevitably bleeds into production. And decisions about how to light a scene cannot be finalized until all the sets are built and dressed, costumes made, makeup choices established, etc. The lighting team needs to plan, but they also need to be on the set to make adjustments in response to decisions the director, actors, and cinematographer are making once shooting begins.
So, how does film lighting work? As with most things, it is helpful to think about the history of the development of film lighting, as it shows how experimentation and discovery led to the establishment (and ongoing evolution) of certain conventions.
If you think back to our opening week and the first decades of cinema, there we were looking almost entirely at films which depended on daylight as their lighting source. Part of the reason the film industry moved from the East Coast (primarily New York and New Jersey) to Hollywood, California in the late 1910s was because of the need for more daylight (Hollywood has about 80 more sunny days a year than Fort Lee, New Jersey, where the film industry in the U.S. first set up shop). While electricity had been introduced to New York and other major cities in the 1880s, it took a long time to take hold (as late as the 1920s, only half of American homes had electricity). More urgently, the early lights were unreliable and unsteady, producing a flickering effect[1]. For that reason natural light was preferable in all respects for some time to what was available artificially in the 1890s.
That said, daylight has its disadvantages as well. First, it is very unpredictable. An early film shoot could be derailed entirely by a cloudy day or a sudden storm, and the movement of clouds across the sun could alter the lighting in disorienting ways in the middle of a shot. In addition, daylight was hard to direct. The earliest film studios, such as Edison’s famous “Black Maria” (below left), brought sunlight in from the ceiling, using a shutter to try and control the amount of light as conditions changed Edison and others soon scrapped this approach in favor of rooftop studios with glass walls and ceilings, with screens to control and direct the light as best as possible. But the results were that everything had a uniform lighting and there was little thought that lighting could be anything other than something necessary to ensure that the image was able to be captured on film.
-

- Edison’s Black Maria, built in 1893
-

- Lubin Studio in Philadelphia, 1899
Artificial lights were introduced along the way to try to provide dramatic effects, but for a long time they had a hard time competing with the sunlight necessary for the very slow film speeds of the earliest film stock. We’ll talk more about film stock and its relation to lighting next week, but what we call a film’s “speed” is simply a measure of its relative sensitivity to light. Since film requires light to produce the image on the negative, a “slower” film speed, which is less sensitive to light, needs brighter lights or, in the case of still photography, longer exposure time. As we will see next week, there are other differences in the look and feel of slower or faster film stocks as well. But in the early years of film there was no real choice: they were all slow, which meant bright light was needed—and for some time the only light consistently bright enough was the sun.
As mentioned early in our discussions, film is an art that depends on two things many Romantic conceptions of “Art” refuse to talk about: money and technology, The evolution of film art has been in many respects linked explicitly to technological innovations and discoveries. This is especially true in the developments in film lighting. Even as film was finding its foundations at the beginning of the 20th century, two strands of technological development were underway independently that would converge to allow filmmakers to be free from the dependence on the sun as their primary source of lighting for production. First, film stocks began to be developed that were faster—that is, more responsive to light. This meant that artificial lights could increasingly be sufficient to capture an image on film. Secondly, and more importantly for the story we are telling here, artificial lights began to become more powerful and more reliable.
After 1910, carbon arc lamps began to be used in film production. These lamps were very bright (and very harsh), but directors found ways of using his harshness to create unique effects similar to those of the chiaroscuro (or, shadowy) paintings of the late Renaissance. Here are on the left below are two examples of chiaroscuro in painting, followed by one, on the right, of how that effect came to be imitated in early film:
-
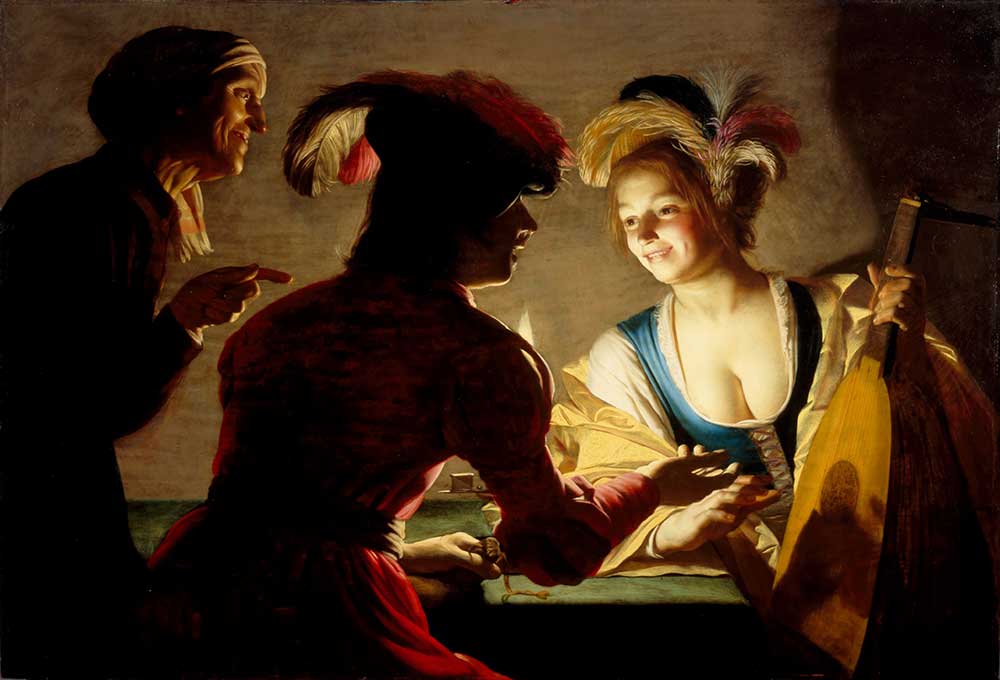
- Gerritt van Honthorst, The Matchmaker (1625)
-
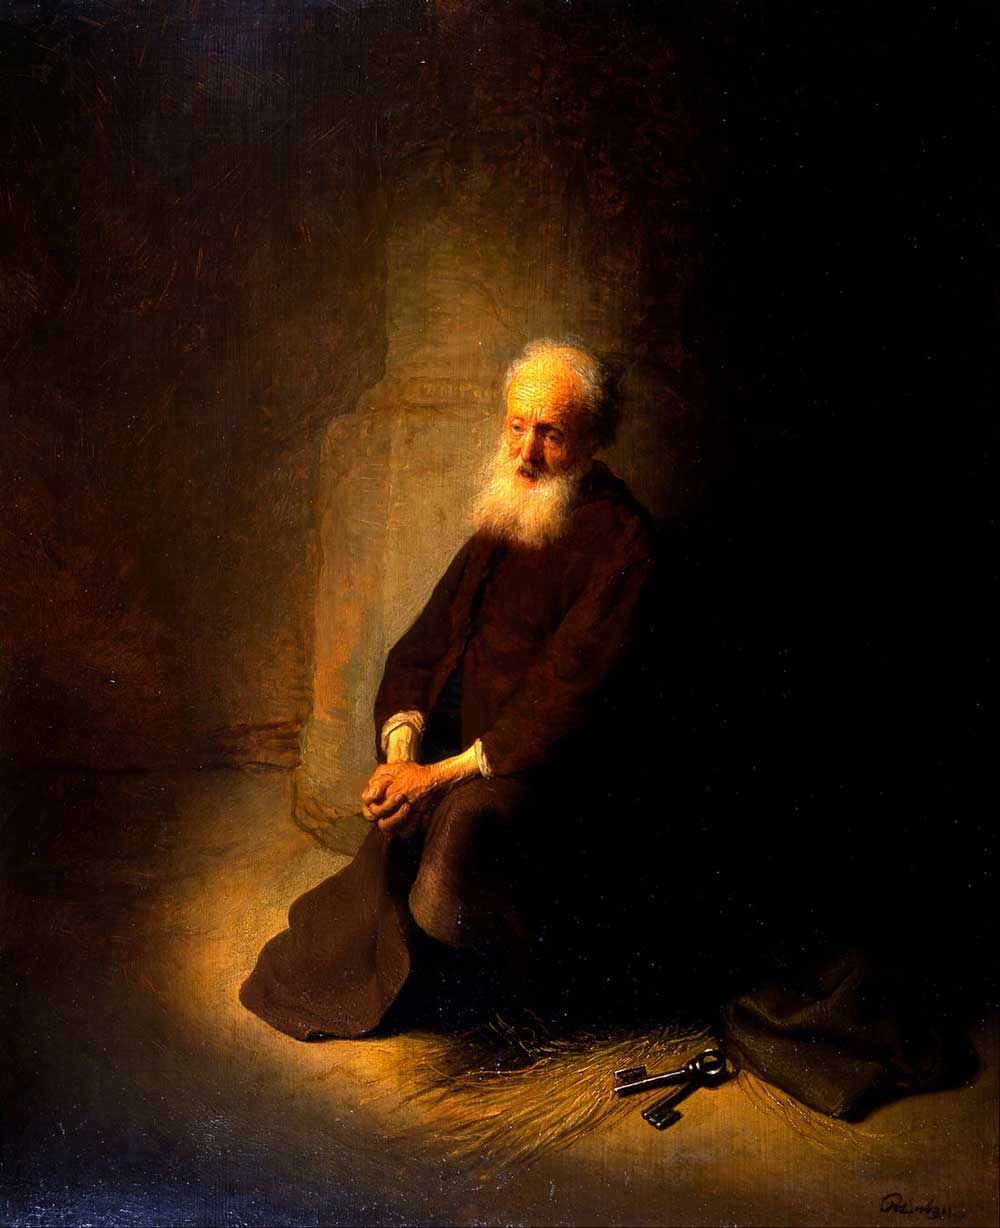
- Rembrandt, St. Peter in Prison (1631)
-

- The Cheat (dir. Cecil B. Demille, 1915)
As you can see from these examples, the chiaroscuro style reproduced in the medium of paint a strong source of bright light in an otherwise shadowy space, allowing shadow to stand in sharp contrast to the light. Pioneered especially in the films of Cecil B. DeMille after 1914, we see this style of lighting being adapted in the medium of film using arc lights casting a sharp light in one directions while the other side remains unlit. This approach to film lighting was perfected in DeMille films by his art director, Wilfred Buckland, eventually becoming so strongly associated with DeMille’s films as to become known as “DeMille lighting” (also referred to as “Rembrandt lighting”).[2]
This is the beginning in Hollywood of using lighting for expressive effects, although examples even earlier can be found in other cinema traditions around the world. Eventually in the U.S., the emotional extremes of the Rembrandt lighting would give way in the 1920s and 30s to the conventions of what is known as three-point lighting, with more even, neutral effects. But it would remain in use for certain genres (horror, film noir), to the present:
-
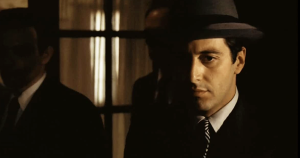
- The Godfather

-
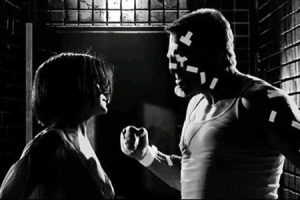
- Sin City

The setup for a single-point “DeMille lighting” approach to lighting is one strong light (sometimes a reflector on the opposite side to soften the harsh divide between light and shadow a bit) at about a 45 degree angle towards and above the subject. With the rest of the subject unilluminated, you capture that effect of the subject emerging out of the shadow and into a sliver of light. Below is a setup using previsualization software to show how this effect can be created on the set:
-

- Setup: Unsoftened light to left of camera
-
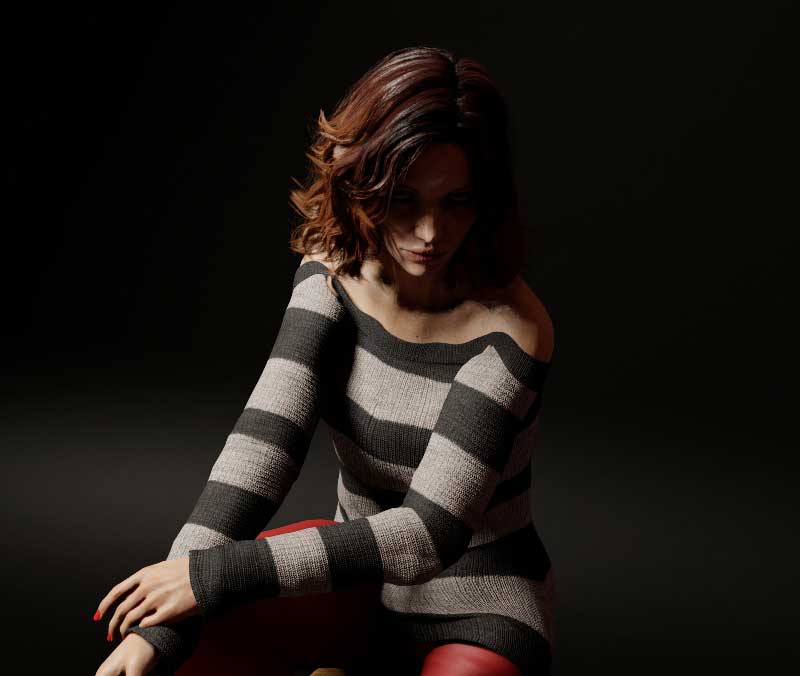
- Image produced
While this approach was wonderful in teaching filmmakers of a hundred years ago what kind of expressive effects could be accomplished with artificial lighting on set, it clearly did not lend itself to all genres or moods. One does not look at the subject to the right above and think we are looking at a comedy or a light-hearted romp. As a result, lighting designers began to experiment with different kinds of lights in different combinations, adding diffusers and reflectors to better control the gradations between the brightest whites and the darkest blacks.
The standard in the Hollywood system became known as three-point lighting (even when there are, as is often the case, more than three light sources involved). The first major light in this system is the one Buckland had experimented with in creating the “DeMille lighting” of the early studio era. This became known as the key light. In order to soften the hard fall-off from this light into the shadows beyond, a second light is introduced, known as the fill light. This light exists on the opposite side of the subject from the key light and is softer and more diffuse—thus retaining the sense of direction of the primary light without pushing more than half of the subject into shadow. Finally, we have the back light; this light serves to separate the subject from the background. The standard set-up looks something like this:

Let’s break it down into increments, first adding just the fill light to the original key light in our earlier setup; compare our digital actress below to the single-point lighting above:
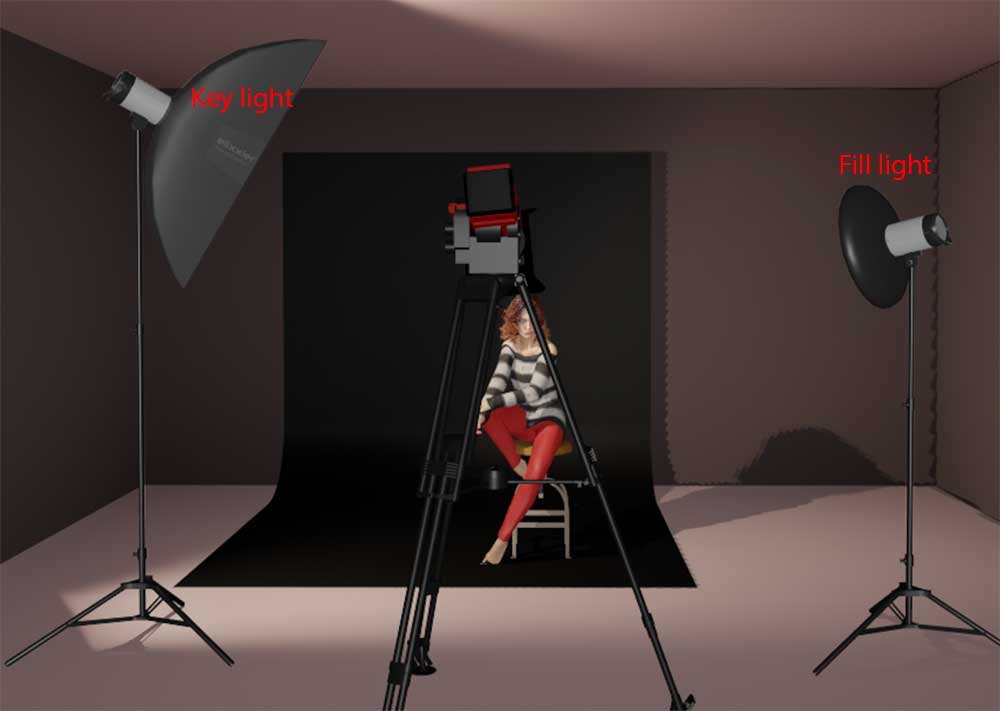
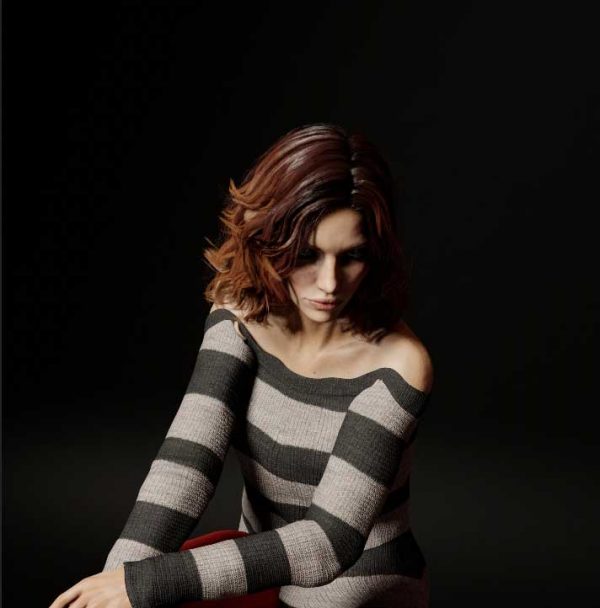
Here, the fill light brings out of the shadow the shoulder and side of the face that remains in darkness in the single-point lighting setup saw earlier. By adjusting angles and intensity of the key and fill lights we can get very different effects in terms of tonal balance; but regardless, the single addition of the second point of light starts to allow us to have a sense of the subject as a whole body whose illumination is stronger than the darkness behind her. Now let’s see what happens when we add a simple back light to the setup, behind the subject (on the side with the key light) and pointed down towards the back of the subject’s head:
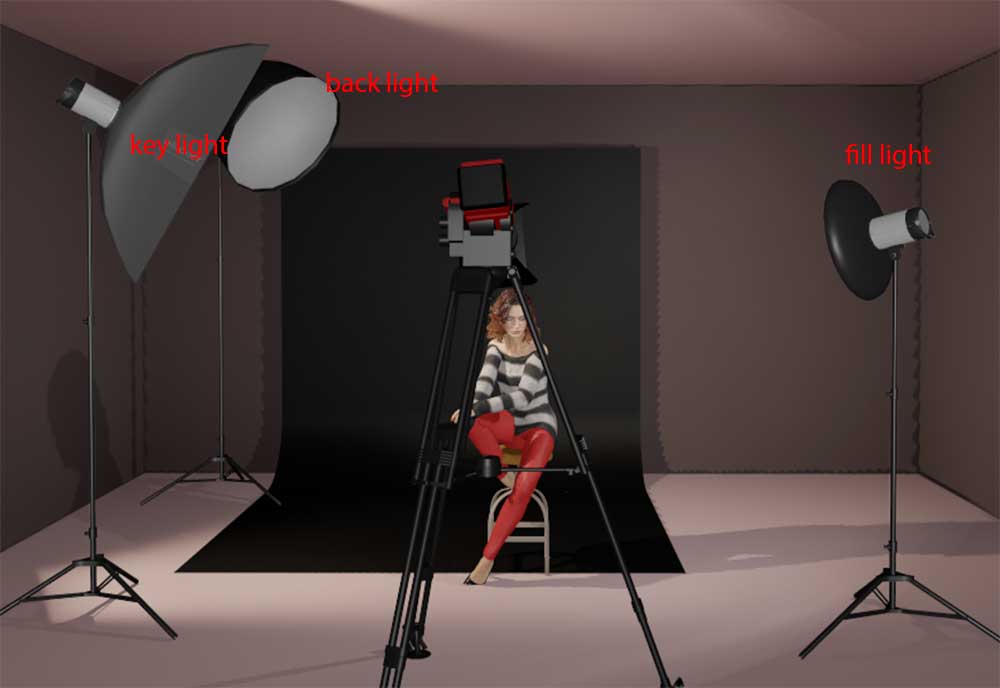
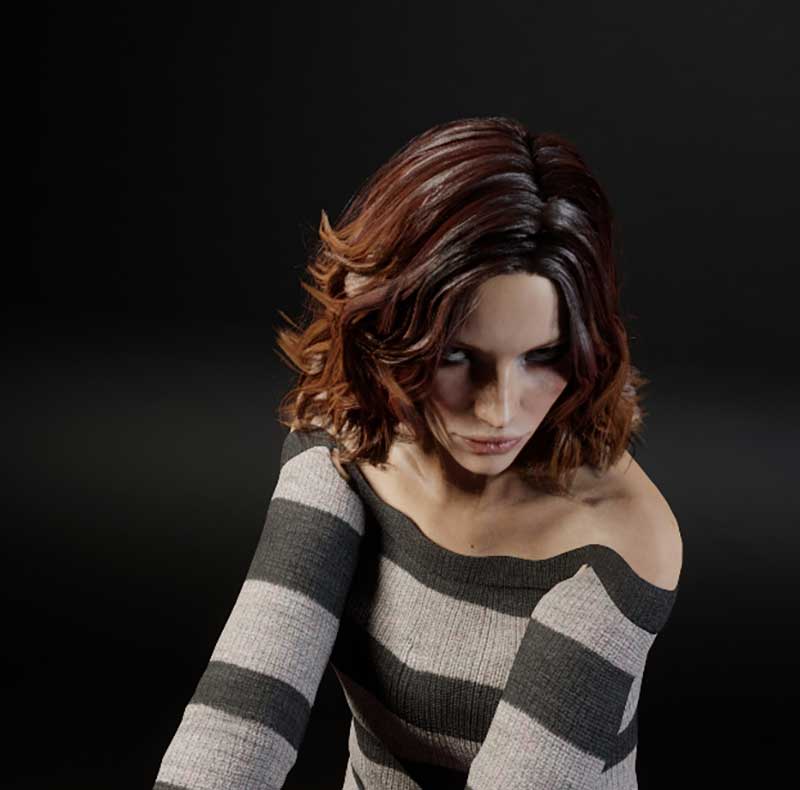
With the three lights we begin to see our digital actor separating from the background. We can see a shine on her hair which lends an air of Hollywood glamor, but more importantly we have a sense of her as a fully realized three-dimensional subject, one whose presence dominates the background (as opposed to in the single-light set up we began with, in which the background seems to be dragging her back into its murky depths).
In the short video below, I walk through in this lighting set-up and its effects:
In the video above, I eventually add a fourth light to the setup, the background light. You can see the ways in which adjusting the level of both the backlight (directed at the subject from behind) and the background light (pointing back at the background) can make a subject “pop” in the clip from Vertigo (dir. Alfred Hitchcock; 1958), below. Here our protagonist is seeing the woman who is going to occupy his every thought for the next many months, first as an assignment and then as an obsession:
Obviously there is a lot going on in this brief scene. Camera movement forges the connection between Kim Novak’s Madeleine and James Stewart’s Scottie, and even before we know who he is there to find, costume has pulled Madeleine out of the many diners in the restaurant. But the green of her dress by itself would not be sufficient to make her glisten like an emerald in its setting: it is the lighting that pulls her out of the crowd even more than the costume. And once she walks into the bar where Scottie is sitting, pausing to wait for her husband to catch up, first the backlight is turned way up (creating a kind of halo around her hair) and then the background light, separating her from the restaurant and seeming to make time—for Scottie, and for us—momentarily stop. This scene in fact is an excellent example—one with little dialogue—of production design (costume, movement of actors, and especially lighting) doing an incredible amount of narrative work that has little to do with words on a screenplay.
As we have seen, the three main lights—key, fill, and back—are a shorthand for a myriad of combinations. The lights can be angled, diffused, increased and decreased in intensity to create a range of different effects. Our goal as film students is to try and think about the positioning of the lights (for example, where is the primary source of illumination—or the key light—positioned in relation to the primary subject?) and anything unusual in their balance that calls attention to itself (as in the above scene). In much narrative film, the look and feel of the lighting is fairly “neutral”—an even lighting that does not call attention as being particularly meaningful. Predictably, we call this neutral lighting: where the lighting is even and balanced throughout the frame.
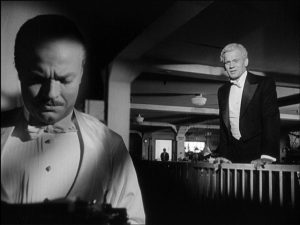
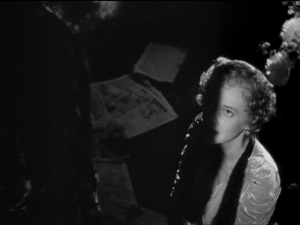
Some lighting jumps out as being far from neutral. This is especially the case with what we call low-key lighting. As a young film student (who was also a bit dyslexic) I always found the term “low-key lighting” confusing in that the key light is not lowered for this shot, but is in fact far more dominant than in traditional three-point lighting; in fact, it is the fill and back lights that are lowered or non-existent for this style of lighting. Often the back light is eliminated entirely, and the effect is very similar to what DeMille was after in 1915 in The Cheat. We will see this at play in some key scenes in Citizen Kane, and it is most closely associated in 1940s and 50s Hollywood with film noir, which borrowed some of its techniques from Kane.
In fact, part of the reason low-key lighting would emerge during the wartime 1940s was that lights were being rationed and budgets greatly reduced as part of the war effort. Low-key lighting allowed them to cut budgets on sets by not lighting (and therefore, not building) the backgrounds, keeping the emphasis on the characters and their psychological drama—a drama represented subjectively in the lighting itself.
My very favorite 1940s film noir of all time is Out of the Past (dir. Jacques Tourneur; 1947). Here, our protagonist (played by Robert Mitchum) has escaped his dark past and started a new life in an idyllic small town. Inevitably, a chance encounter allows those he had hoped to leave behind forever to find him, forcing him to have to explain everything about his past to his new small-town girl—including about his disastrous affair with his ex, Kathie. The film switches between a neutral lighting scheme for our protagonist in his current happy life with Ann to a heavy use of low-key lighting for the scenes set in his past with Kathie. Below we see Jeff (Mitchum) with Ann and, on the right, with Kathie, in the past:
-
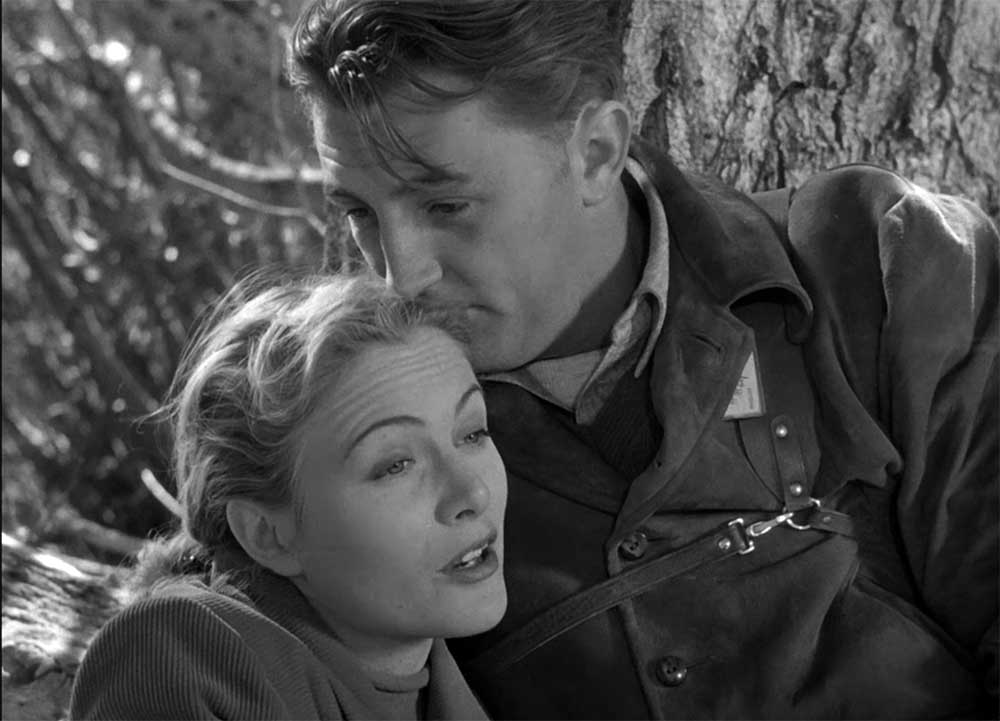
- Two-shot
-

- Jeff with Kathie
On the left, we see a wide range of grays across the spectrum. Contrast—the range between the blackest black and the whitest white—is low and evenly gradated. This is an example of neutral lighting. On the right, however, we see major portions of the frame completely in darkness and the unsoftened angular light on the right side of Kathie’s face only calls attention to the darkness that envelops Jeff (and the other half of her face). We can reverse-engineer the lighting here, seeing a strong keylight up over Jeff’s shoulder on the right of the screen, and a moderate background light to gently illuminate the background and create a sense of the depths of the space. Aside from a reflector or two to target the light a bit more precisely, that was probably it. The shot on the left, however, despite being shot outside, probably had a half dozen lights around the figures to evenly illuminate faces and to separate them from the rural landscape behind them.
Using our virtual studio, here is an example of how a film noir setup would look, with its in-camera results on the right:


On the opposite side of the spectrum from low-key lighting we have high-key lighting. If in low-key lighting the blacks are most prominent, commanding the gravity of the frame, in high-key lighting it is the whites, the light end of the spectrum, that dominates. We can see the contrast between high- and low-key nicely in the film Wild Strawberries (dir. Ingmar Bergman; 1957), in which the protagonist, an aging professor, explores happy memories of his childhood (in the still on the left, below) and sad memories of his failed marriage (below, right). The memories of his childhood vacation home are brightly lit, across a wide range of whites set up to brightly and evenly light all surfaces. We see few grays and fewer blacks (the white costumes and table settings of course amplifying the effect).
-

- happy memories (high key lighting)
-

- … and sad (low key lighting)
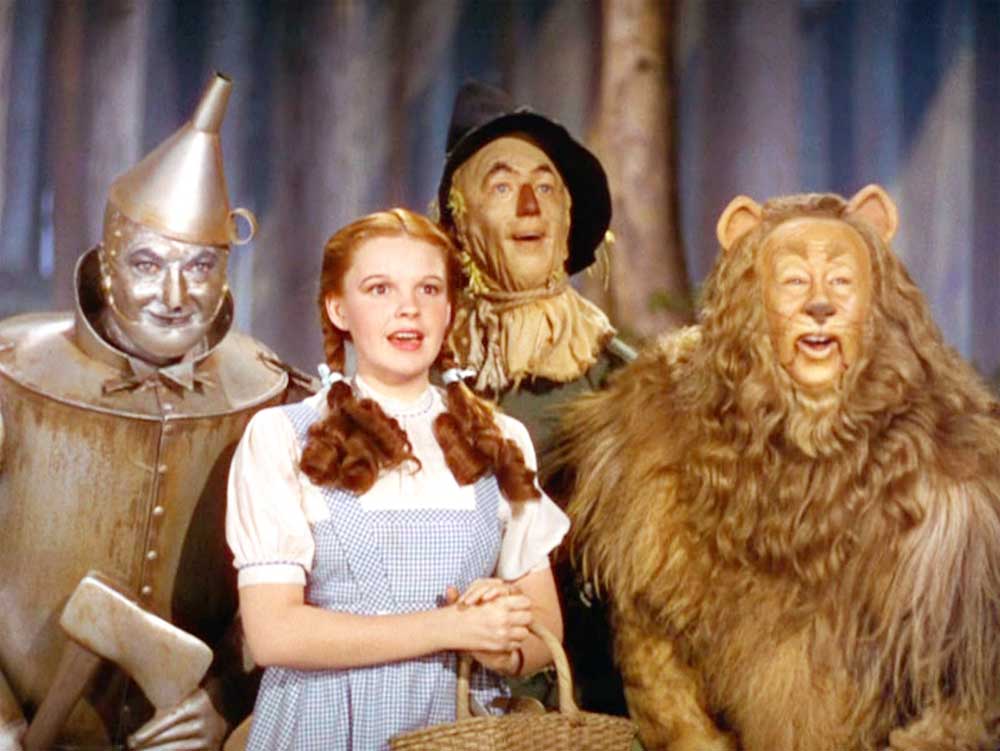
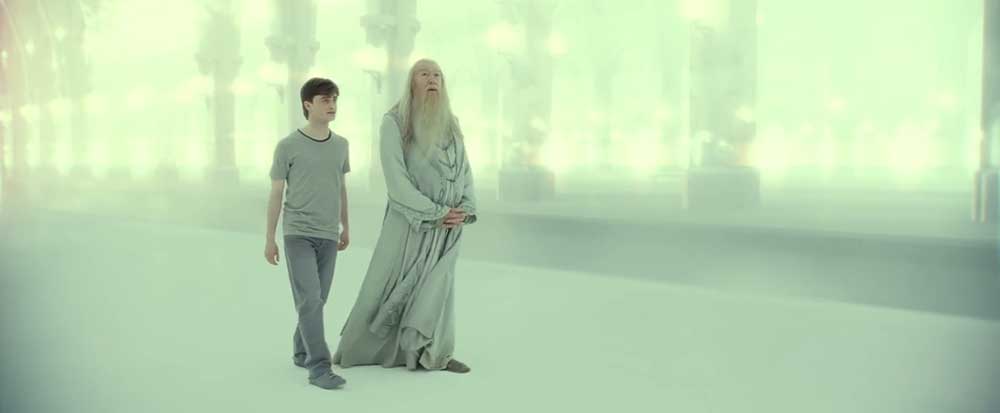
In the 1940s and 50s, high-key lighting began to be commonly used for movies associated with lighter fare or directed towards children, and even today when we see a film with bright even lighting we often assume a lighter tone to the film (an expectation which can of course be used to surprise the viewer when the tone turns suddenly dark). High-key lighting can also be used to convey fantasy or a space apart from the more neutral lighting of the rest of the film, as in the scene of Harry’s other-worldly visit with Dumbledore in Harry Potter and The Deathly Hallows Part 2 (dir. David Yates; 2011).
-

- Wizard of Oz
-
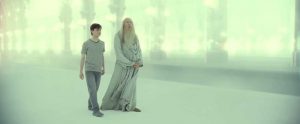
- Harry Potter and The Deathly Hallows Part 2
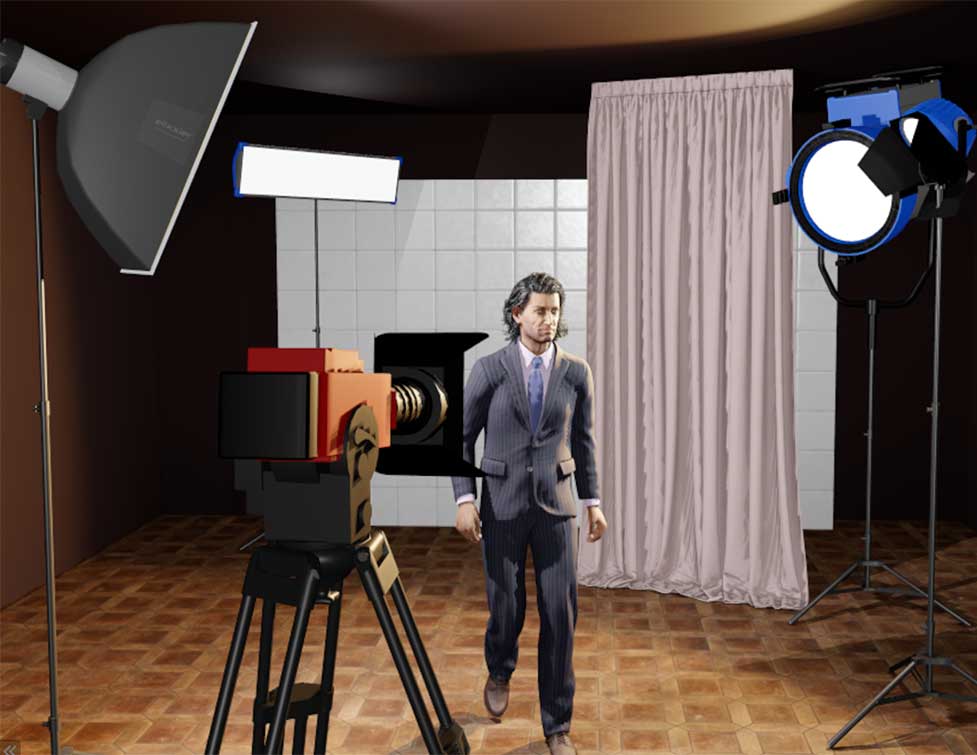
Below is one way of setting up a high-key lighting shot. While I left our digital actor where he was, I replaced the dark red curtain (which absorbs light) with a light curtain (which reflects), and similarly replaced the brick background with white tiles. Thus we see that lighting and set design are integrally related in the effect one wishes to achieve. I maintained the black-and-white photographic result, so it could be more easily compared to the low-key version of the same figure above. You will see I used four lights, circling our actor, so he is illuminated fully from above, as if surrounded in light on all sides.

| high-key lighting | low-key lighting |
| low contrast | high contrast |
| Bright highlights dominated by range of whites | deep blacks, darker tones, and shadows |
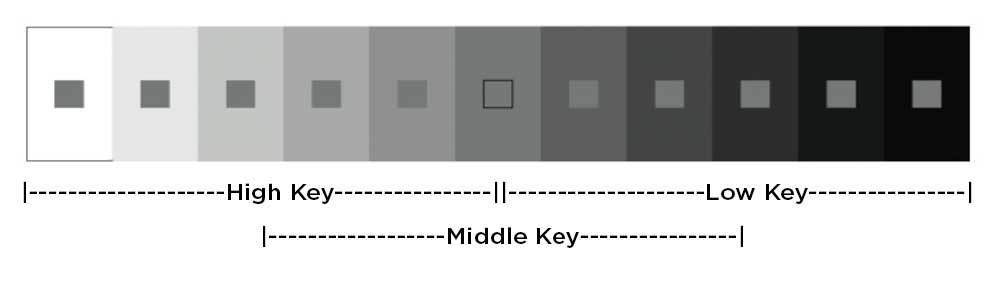
The table above offers us some descriptive language to capture the effect of high-key and low-key lighting in film. Of course, the majority of shots we will see in most films fall in between, in the middle ranges of the spectrum between the highest highs and the lowest lows:
 Thus we might find ourselves also thinking about an aspect of the lighting designer’s work that plays out more in the range of color palette. Increasingly in the digital age, a lot of color refinement happens in post-production, as color grading allows for the creation of remarkably uniform or deliberately clashing palettes of color in the final image on the screen. But long before there was digital editing, and even today in the era of digital photography, colorwork is happening in the lighting setup as well.
In the above examples from our virtual studio, all the lights are white. This means I did not apply gels to the lights. Gels are sheets of heat-resistant transparent plastics placed over a lamp to color the light it projects. Using gels is an extremely old practice, long used in theater to help convey mood or atmosphere through the coloring of the lights projected down on the actors. Even in the age of black-and-white movies, before color became the standard, it was quickly discovered that colored gels changed the feel of the black-and-white photography. Once color film was introduced, extensive experimentation was engaged in to figure out what impact different colored lights had on different color film stocks.
Here is a brief video in which I try out a few virtual gels on our “actor”:
As I mention in the video, extremely strong gel effects are used infrequently. But it is their scarcity that makes them all the more striking when they do appear, as in these two examples below:
-

- Run Lola Run (dir. Tom Tykwer; 1999)
-
- Blue (dir. Krzysztof Kieślowski, 1993)

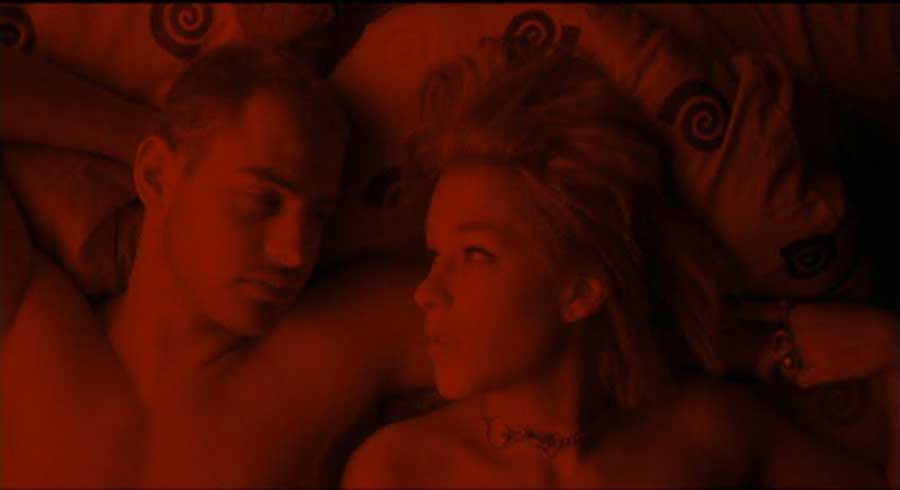
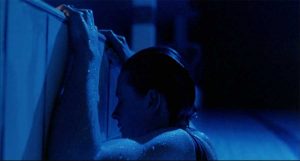
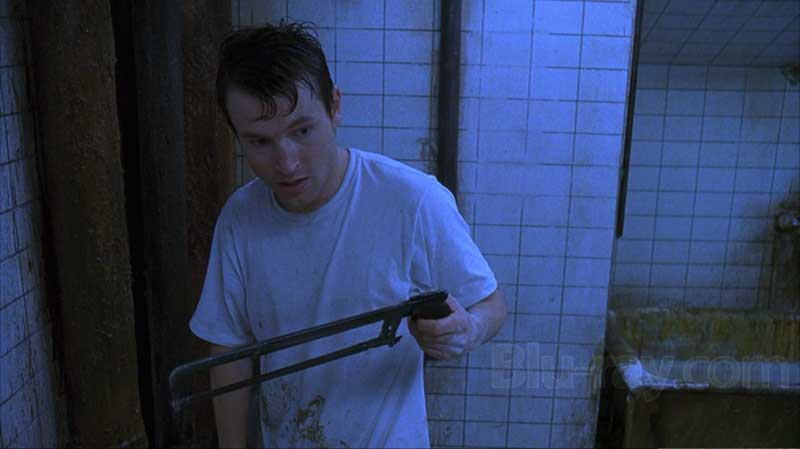
Most often gels are used for more subtle effects, but they are almost always in use. In fact, colors of gels go through periods of being in or out of fashion, and one way to identify the period of a film for someone with a better eye than I posses would be to identify the gel being used. Blue gels (and additional color gradation) was commonly used in the first decade of the new century, so much so that it became identified as an overused trope in popular criticism:
-
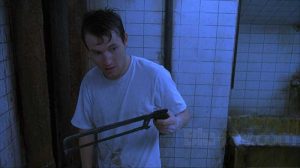
- Saw (dir. James Wan, 2004)
-

- Minority Report (dir. Stephen Spielbeg, 2002)

Despite criticism of its overuse, it remains in use today, especially in a lot of “gritty” television drama.
As you are watching a movie and you happen upon a striking scene, hit pause and see if you can picture what is happening off screen with the lighting set up, starting with identifying the position and angle of the key light. Does the light have a particular shade or tint? Is the colored light coming from the key, or one of the secondary lights on the setup? We can never know for sure, without the lighting designer there to confirm it, exactly how the setup worked. But our goal is to imaginatively recreate the scene, like Sherlock at a crime scene (but without getting quite as dotty as Sherlock)

Playing with Film
Cecil B. De Mille said, “Lighting is to film what music is to opera.” Whether filming on celluloid or digital, there is no film without light. Since I love film (and plants), I love light. Probably that comes through in the chapter and embedded videos. I worked for a photographer back in highschool and hated the darkroom and almost everything about the job except the lighting set ups. Film lighting is obviously more complicated than in a still photographer’s studio, but the basic principles are the same. And this is something you can even play with with a couple of flashlights or desk lamps and a cellphone camera. Some prompts to play with this week (as always, do at least one and check in on and engage with your classmates’ responses as well):
- As we the chapter discusses, most films primarily work with the middle ranges between high and low key lighting—the kind of neutral mid-key lighting we might associate with a properly illuminated room. But most films have scenes where higher- or lower-key lighting is deployed. Scan through a film we have watched this semester and find a scene where the lighting shifts to one of the more extreme ends of the spectrum, high or low—or in which the lighting seems to go in a direction in some other way different from the default lighting of the majority of the film. Describe the effect of the lighting on this scene and why you think the lighting designer (in consultation with director and cinematographer) chose this approach.
- There are some fun online tools to experiment with lighting design — not quite as advanced as the software I used for the virtual studio in the chapter, but close …and free. Take some time and play with one of these, such as virtual lighting tool at http://www.zvork.fr/vls/ . Here you can light a subject using different types and combinations of lights. I made a brief video below to get you started playing with it. Your assignment (should you choose to accept it) is to find your favorite setup—combination of lights, gels, angles and positions—and screenshot your subject and setup and explain why you chose this particular lighting design.
If you want to get more into the weeds/details, you can download a trial of the software I used in the lighting videos in this chapter at https://www.elixxier.com/en/set-a-light-3d/Links to an external site.. Learning curve isn’t too bad, but feel free to ask me any questions.
https://osu.instructure.com/media_objects_iframe/m-3Cymh34SA6ZYVUxdqbFFxK2BW5LJRaji?type=video
Media Attributions
- 3-point-lighting2
- Gray-Scale-High-Key-Low-Key
- This flickering effect is what gave movies their enduring nickname "flicks" ↵
- In those days, a production team for a film was quite small compared to today. In The Cheat, the entire crew outside of the cast consisted of a producer, a composer, a cinematographer, and an Art Director, with the latter serving as set designer, costume designer, and lighting designer. ↵
a translucent or semi-transparent cover that spreads out or scatters light
a type of lighting style that accentuates shadows and high contrast
a lighting style that results in a brightly lit frame with minimal shadows and low contrast
