Skill Group: Clinical Skills
Dental Radiography- Normal Anatomy and Intra-oral Image Orientation
Dr. Stephen Horvath and Krystal Bowers
This skill is part of the skill unit: Small Animal Oral and Dental Health I
Introduction
As recommended in the 2019 AAHA Dental Guideline, full mouth intra-oral dental radiography is an essential step in a complete prophylactic and therapeutic dental procedure performed under general anesthesia. Without it, a veterinarian is unable to fully evaluate the oral health of a patient, and therefore unable to recommend and perform the most appropriate therapeutic procedures for their patients. Dental radiographs are a standard of care.
Stimulate Prior Learning
You’ve previously learned normal gross dental anatomy, the Modified Triadan System, and how to systematically perform a full anesthetized oral exam including probing (looking for periodontal pockets and furcation exposure). Now you will translate that knowledge to identify important anatomical structures of teeth as they appear in dental radiographs. Additionally, your knowledge of basic small animal dental anatomy and tooth formulas will allow you to identify which tooth/teeth you are viewing on a dental image, decide if the image is labelled correctly, and to orient the image appropriately.
We need to understand the dental formulas outlined in Lesson 2, normal anatomical structures and oral anatomic directional terms as outlined in Lesson 3 and from the VME 1 anatomy course. We will provide additional information necessary in this module as well.
Learning Outcomes
Upon completion of this module you will be able to demonstrate an understanding of dental anatomy as it appears on an intra-oral dental X-ray. Additionally, you will be able to orient yourself and the dental radiograph images in order to properly document any abnormalities correctly in the medical record.
By the end of this module, you should be able to:
- Demonstrate an understanding of normal anatomy in dental X-rays in dogs and cats
- Demonstrate an ability to properly orient dental Xrays
- Reinforce an understanding of normal dental anatomy and the modified triadan system using dental X-rays
Normal Dental Anatomy on an X-Ray
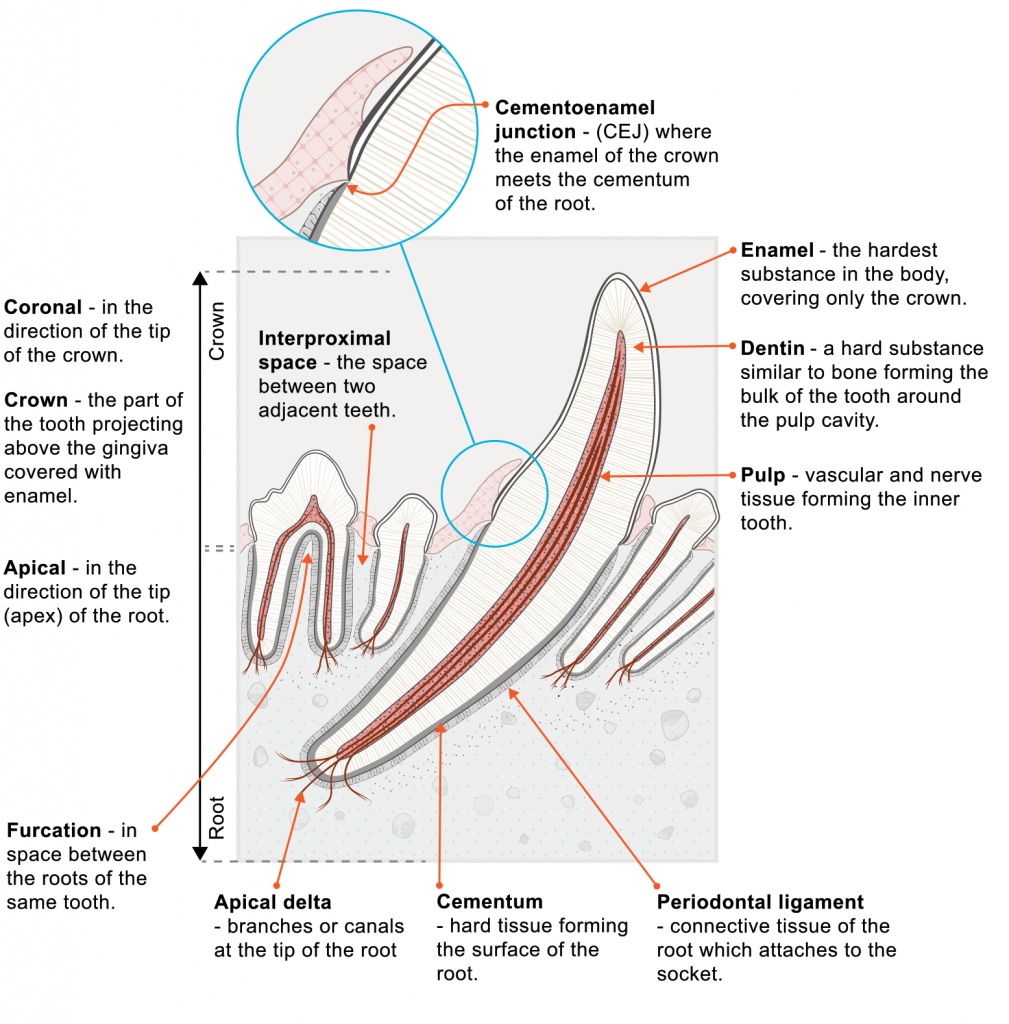
Below is a figure from the 2019 AAHA Dental Guidelines document that illustrates dental anatomy as it is often seen on a dental radiograph.
Please Access the below article from Today’s Veterinary Practice and review the figures and radiographic images which are labelled with different anatomical structures. The article is entitled Interpretation of Dental Radiographs in Dogs & Cats, Part 1: Principles & Normal Findings – by Santiago Peralta, DVM, DAVDC, and Nadine Fiani, BVSc, DAVDC, Cornell University
For this section reading the entire article is not required, but it is recommended and will be extremely helpful. Part 2 is also very helpful for abnormal findings and a link is available in module 10.
*Note – It is helpful to export the article as a PDF for viewing. Do this by clicking the File and then select Export as PDF.
Dental X-Ray Orientation: Which tooth is that?
It is important to be able to orient yourself when looking at dental X-rays so you know which tooth or teeth you are viewing. Doing so is vital to translate your diagnosis, treatment plan and execution of that therapy to the patient under anesthesia. In short, if a tooth needs root planed or extracted it’s imperative that you are performing that treatment on the correct tooth. Here are a few key points that help me do this. Remember, it all comes back to knowing your anatomy and the dental formulas for the species you are working with.
Practice Time!
INSERT REFRESHER H5P
See if you can do this without looking it up! Don’t worry it’s not for your grade. Testing yourself, and that feeling of difficulty, will actually trick your brain into remembering it better and result in better long-term retention
(For more information on that nerdy point refer to the book à Make It Stick: The Science of Successful Learning by. Brown, Peter C., Roediger III, Henry L., McDaniel, Mark A.)
Ok, Great Job! Now let’s discuss how this applies to Dental X-ray orientation. Since a single dental X-ray image will only contain a limited number of teeth, knowing the answers to the questions above will allow you to deduce which teeth you are looking at in most scenarios.
Prior to this however you will need to be able to deduce which quadrant you are viewing (sometimes they are accidentally mislabeled). Here are a few key points to allow you to do this.
- When looking at a dental X-ray, imagine that you are looking at a patient face to face OR at the side of the patient’s face. For the maxillary incisors, from the top of the nose, and for the mandibular incisors, from the bottom of the chin .
- What I mean by this is that you are NOT looking at a mirror image. It is not a reflection. It is a shadow.
- The right side of the computer monitor → (and your right side) is the patient’s left, and the left side ← (your left) is the patient’s right.
- When looking at the left maxilla or mandible, mesial of the mouth will be towards your LEFT.
- When looking at the right mandible or maxilla, the mesial direction is to your RIGHT.
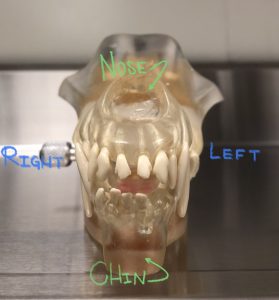
Figure 1: Face on Directions 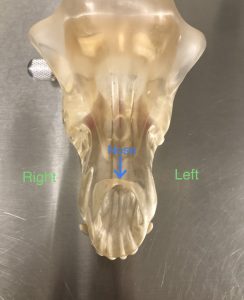
Figure 2: Nose down 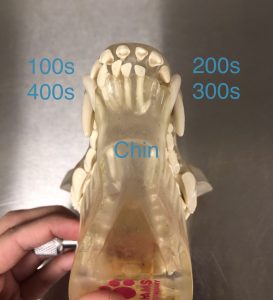
Figure 3: Chin Up - Maxilla vs Mandible –
- The crowns of the teeth on the maxilla will be pointing down and those of the mandible will be pointing up. If they are oriented incorrectly, you can fix this by digitally rotating the image.
- Additional maxilla clues, are that the maxilla will have anatomical markers of the nasal cavity that extend through the top of the image: 1) the palatine fissures, 2) a sclerotic white line above the root tips = the hard palate portion of the maxilla, 3) 3 rooted teeth, 4) the zygomatic arch.
- Mandible Clues – 1) More gas opacity above, below, and centrally depending on the shot. This is surrounding the mandible, 2) the mandibular symphysis, 3) the mandibular canal at the root tips (visualized as a less radio-dense horizontal line) 3) The middle mental foramen around the root tip of 305 and 405.
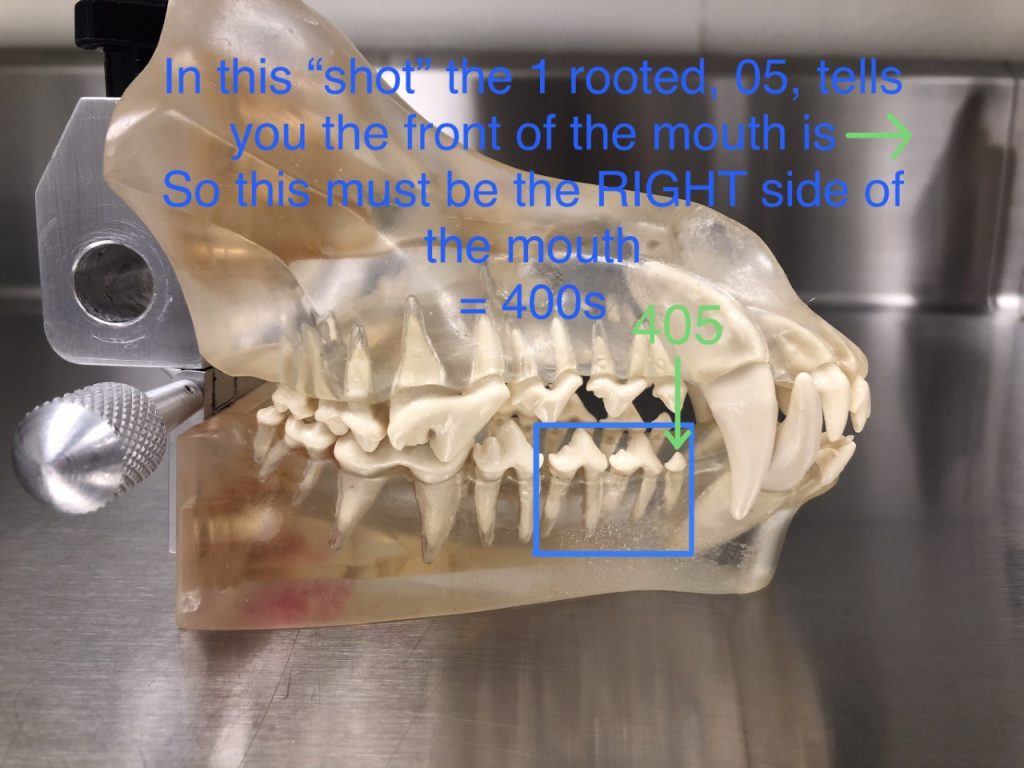
Figure 4: R Lateral View- The Blue rectangle represents a dental X-ray image. 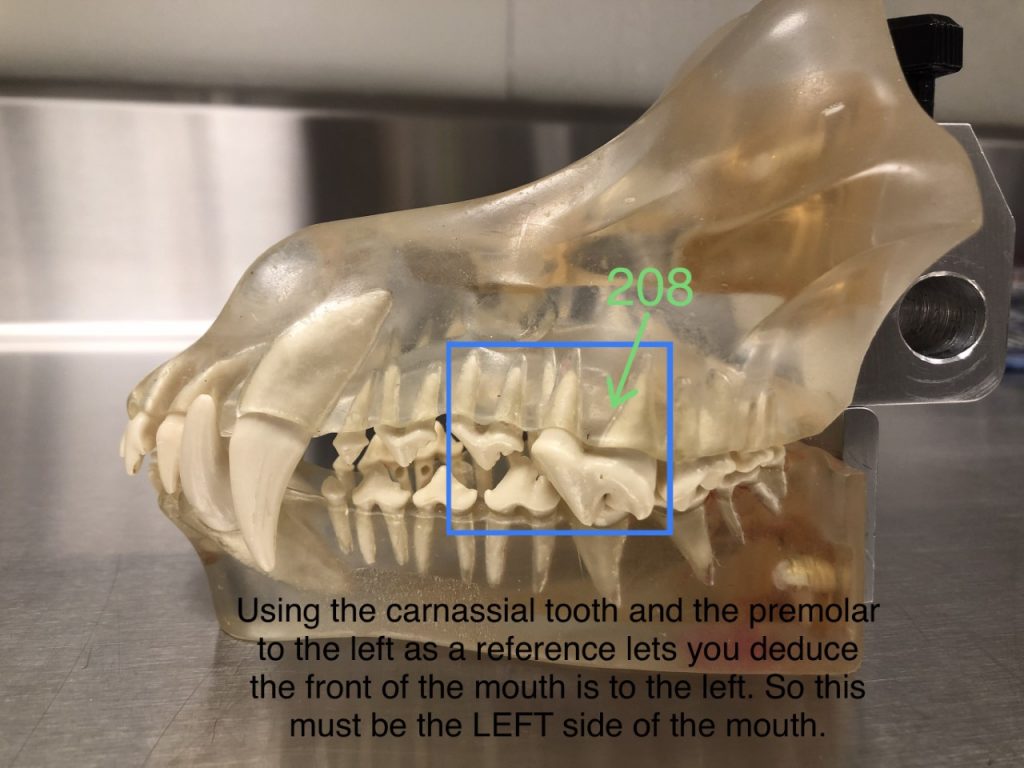
Figure 5: L lateral view- The Blue rectangle represents a dental X-ray image. - Putting it all together
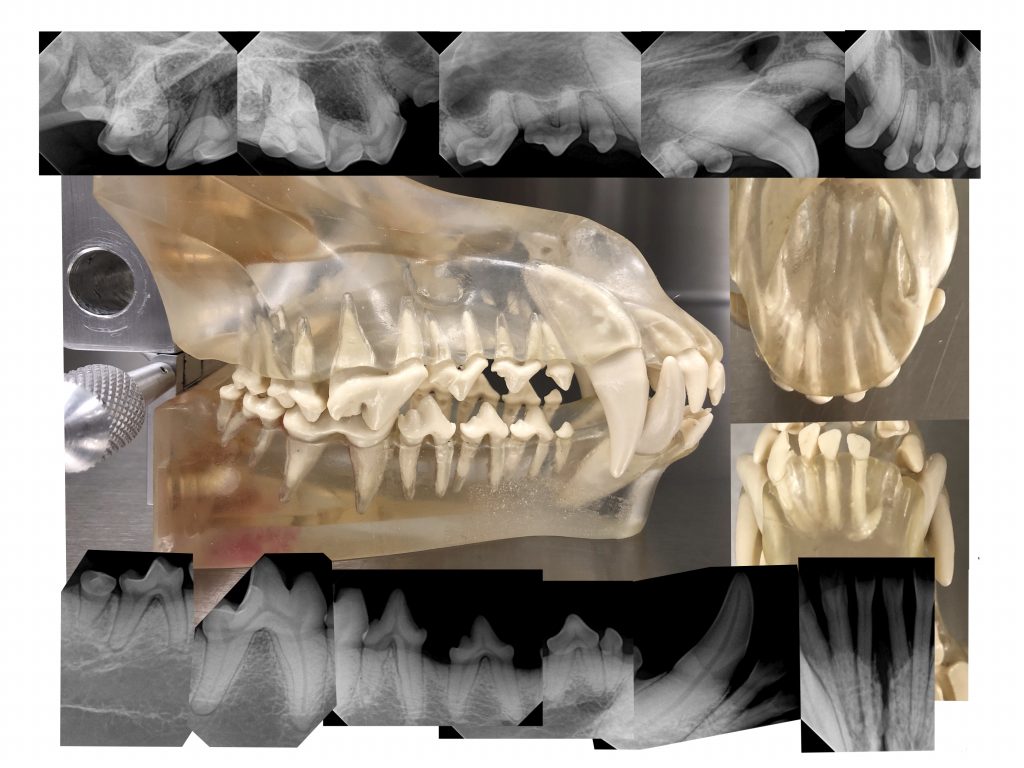
Figure 6: Right Lateral View with X-ray 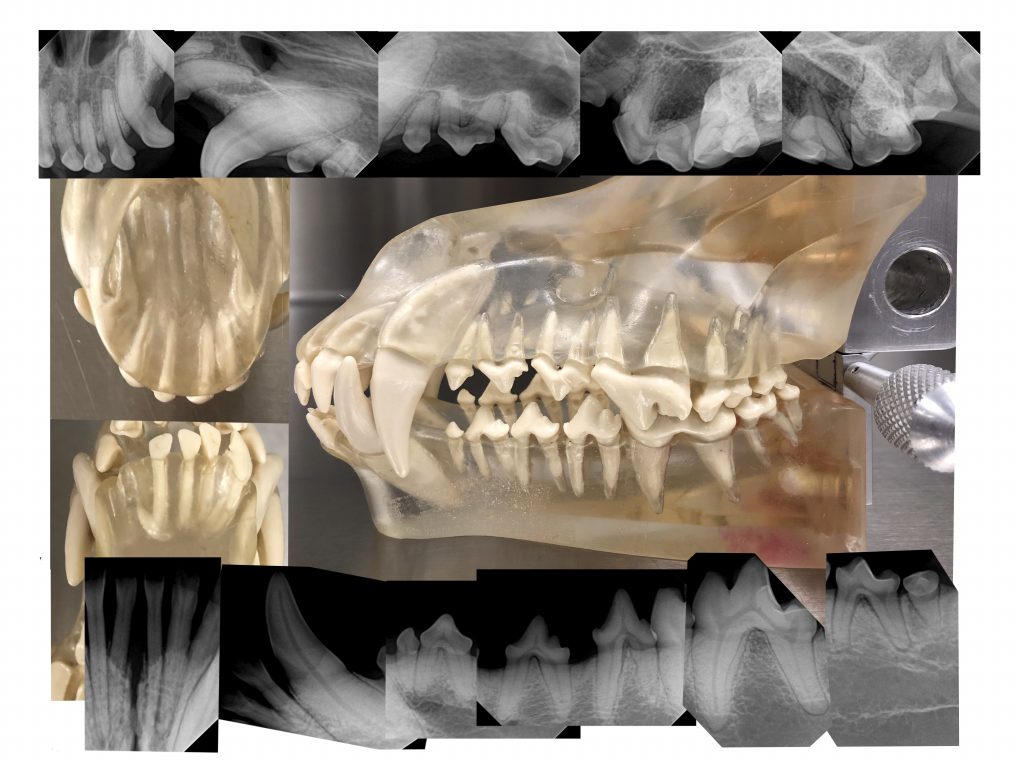
Figure 7: Left Lateral View with X-ray
Practice Time!