Skill Group: Dermatology
Goal One: Dermatology and Otic Examination – Examination of the Ears
Before You Start …
Make sure you have the following equipment: Otoscope dog ear model, otoscope, otoscope speculum.
Here are some considerations for this skill:
- Please ensure the otoscope is turned off after use (otherwise the battery will die and the otoscope will be unusable for the next person)
Introduction
A complete otoscopic examination should be performed on every animal that presents for skin and/or ear disease and neurologic diseases, such as vestibular disease or facial nerve paralysis.
Learning Outcomes
By the end of this lesson, you should be able to:
- Describe observations related to ear disease that should be done and recorded before performing the otoscopic examination
- Assemble an otoscope
- Select the correct size of an otoscope speculum for the patient
- Describe how to perform an otoscopic examination
- Demonstrate the ability to perform an otoscopic examination
- Distinguish the different parts of the tympanic membrane
Technique 1: Assembling the Otoscope
Here are the steps for performing this technique:
- There are a variety of different makes of otoscopes available in practice. These instruments may vary in power supply, size and how they are assembled.
- To avoid dropping and damaging an expensive piece of equipment, it is important to know how to assemble the otoscope before beginning an otic examination.
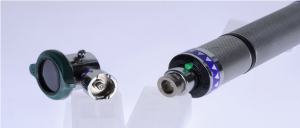
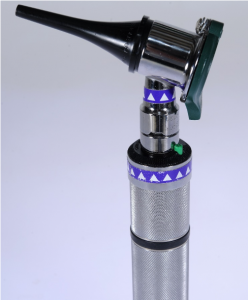
- The otoscope has three pieces, the handle, mid-piece and head-piece.
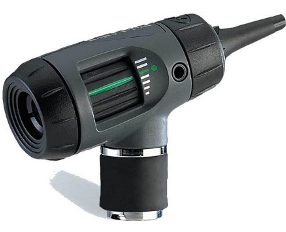
- There are many different types of head-pieces, including the following:
- Pneumatic otoscope head
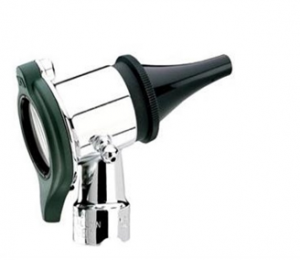
- Operating otoscope head
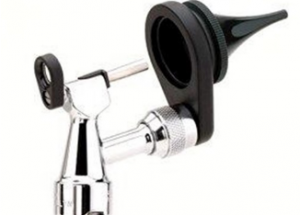
- MacroView otoscope head
- Pneumatic otoscope head
- Start assembly by screwing the mid-piece into the handle of the otoscope. Some otoscopes may have the mid-piece and handle as a combination unit
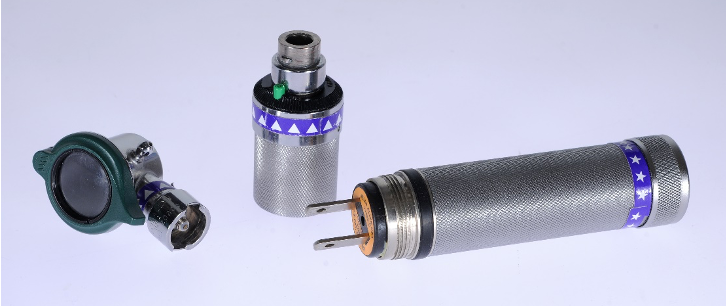
- Next attach the head-piece to the mid-piece; the head-piece is the part that contains a light source and a magnifying lens. Align the notch on the handle mid-piece with the notch on the otoscope head-piece, and push the two components together.
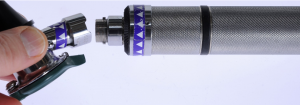
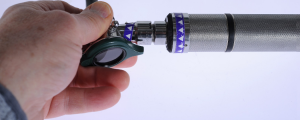
- Gently push downwards on the otoscope head-piece and twist it clockwise. This will lock the head-piece onto the handle. (In reverse, to remove the head-piece, twist it counter clockwise, and it will then automatically ‘eject’)
- Pick a speculum (cone) which is a suitable size for the patient. Ensure that it is clean and dry. The speculum is fitted onto the head-piece by pushing it onto the head-piece. (Note that you will use a new cone for each user)
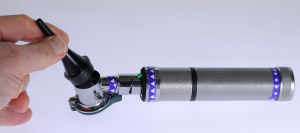
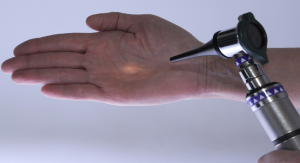
- Check to ensure the otoscope light works by turning the otoscope on. To do this, depress the small green button down on the otoscope handle while simultaneously turning the rotating black serrated top piece clockwise until it locks. Confirm the otoscope works by visualizing light emitting from the speculum tip.

Technique 2: The Otoscopic Examination
Here are the steps for performing this technique; a video that walks through these steps is available:
- Before beginning the otoscopic examination, observe the patient’s ear and head carriage from a distance.
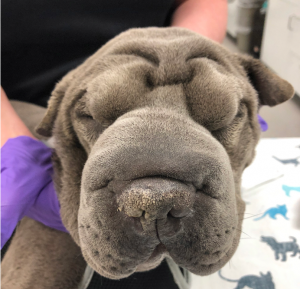
- When viewed from the front, does the patient hold both the ears at an equal level or is one carried lower than the other?
- Does the patient have a head tilt?
- Does the patient have any evidence of facial nerve paralysis?
- It is important to remember that many ear conditions and infections can be painful so the ear pinna should be handled with care. Even the friendliest of dogs or cats may respond aggressively to pain so the use of a muzzle or sedation should be considered.
- Place the patient on the examination table, and have an assistant provide gentle restraint.
- The assistant(s) stands on the opposite side of the dog that is being examined. The assistant should place one hand behind the dogs head to prevent the dog from moving its head backwards and the other hand cupped over the dorsal muzzle of the dog to keep the dog from swinging its head away or towards the examiner. To examine the other ear, the assistant and vet will swap sides.
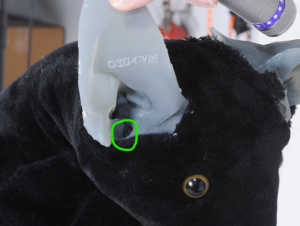
- Lift up the ear pinna (auricle) with your non-dominant hand and examine the concave surface of the pinna and vertical canal for evidence of inflammation.
- Start with the least irritated ear, to determine the pet’s temperament for the otoscopic examination.
- Normal external ear canals should be: 1) Light pink with small superficial vessels, and 2) Glistening (due to a light coating of cerumen).
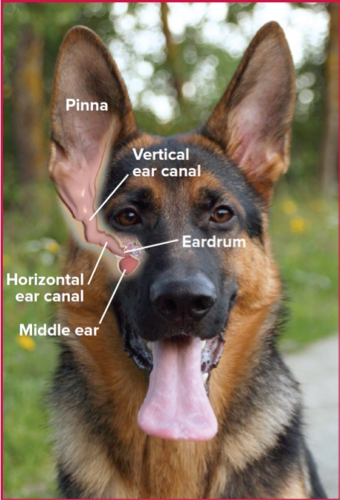
- The ear canal is splint into the vertical and horizontal parts. There is a sharp bend (75°) as the ear canal transitions from vertical to horizontal
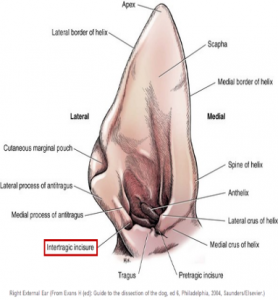
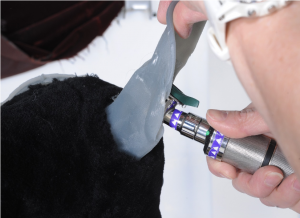
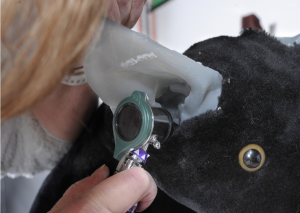
- With the otoscope in your dominant hand, gently introduce the tip of the speculum into the opening of the ear canal by finding the intertragic incisure, which is a comfortable resting place for the otoscope.
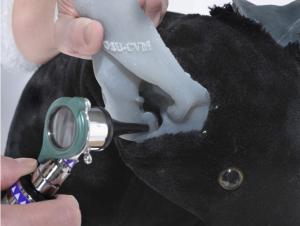
- Slowly guide the speculum down the vertical ear canal. Look down the otoscope while advancing the speculum. Continue to follow the vertical canal by looking through the otoscope and advancing down the canal.
- Note the vertical angle (slightly medial and ventral) placement of the otoscope.
- Looking down the otoscope reduces the chance of pushing the tip of the cone into the wall of the ear canal which may cause pain.
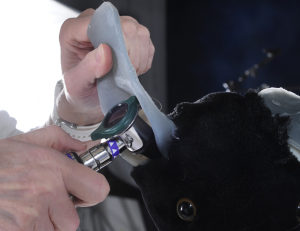
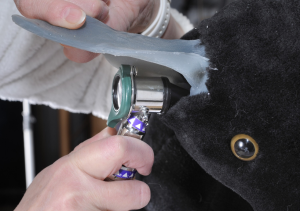
- To visualize the horizontal ear canal, “turn the corner” by gently pulling the pinna upwards and toward you to straighten out the canal. This will allow you to go under Noxon’s Ridge (cartilaginous protuberance that is painful if hit with otoscope when the canal is in its normal angled confirmation). The speculum will end up at 90° to the patient’s skull.
- To see along the horizontal canal the speculum must be at the same angle i.e., horizontal.
- You will notice that the horizontal canal contains almost no hair, whereas the vertical canal is sparsely haired
- When passing the speculum down the ear, notice the amount of wax and debris which may be purulent, in the canal. Wax or debris may fill the tip of the speculum and therefore need to be removed and cleaned to improve visualization.
- Assess the canal’s level of patency, stenosis, erythema, erosions, ulcerations, color, proliferative changes, presence of foreign bodies, parasites, tumors, excessive wax or hair.
- At the end of the horizontal canal is the tympanic membrane. It can be visualized as a piece of flat, pale, thin and transparent membrane when it is normal. Distinguish the pars flaccida (dorsal) from the pars tensa (ventral):
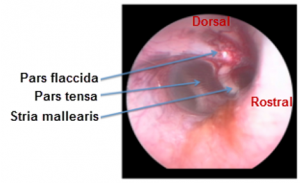
- Pars flaccida: DORSAL area with vascular bed.
- Pars tensa: Large, semitransparent, concave VENTRAL portion.
- Stria mellearis: The arm of the malleus (“manubrium”) embedded in the tympanic membrane. The tip of the manubrium should point rostrally
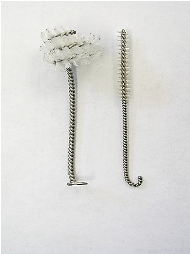
- Slowly withdraw the speculum and wipe any debris off of the speculum with a 4×4 gauze sponge. Clean the speculum with ear speculum cleaner brush and warm water and then place both the speculum and brush in disinfectant for at least hour or autoclave the ear speculums.
Wrapping Up
After this lab session, you can now assemble an otoscope and instruct staff on proper restraint of the pet so that a through otoscopic examination can be performed. You now understand normal and abnormal findings of the ear canals and the tympanic membrane, which in turn allows you to formulate differential diagnoses, helps you to interpret the significance of ear cytology results and formulate treatment plans.
Next, we will learn how to collect cytology from the skin and ears.
Before Moving On …
Use the self-check activities below to check your understanding.
(Under development)