Skill Group: Clinical Skills
Dental Radiography – Taking the X-rays
Dr. Stephen Horvath and Krystal Bowers
Note: For this lab we will be focusing on digital dental Xrays, as that is the most common and efficient modality. Some clinics are still utilizing hand dipped intra-oral Xray films and the key skills you will be taught below still applies to those systems.
Taking Intra-oral Dental X-Rays:
Read the following peer reviewed article from Clinician’s Brief which does an excellent job explaining the basics of dental radiography equipment and positioning techniques. It is entitled Obtaining High Quality Dental Radiographs. It is Part 1 in a 2 part series. Part 2 discusses the financials involved in purchasing new equipment and the Return On Investment (ROI) associated with that, using dental radiography as an example. It’s a good read, but part 2 is not required for this lab.
https://www.cliniciansbrief.com/article/obtaining-high-quality-dental-radiographs
Orthogonal Angle Technique for Maxillary 08, 09, and 10 teeth:
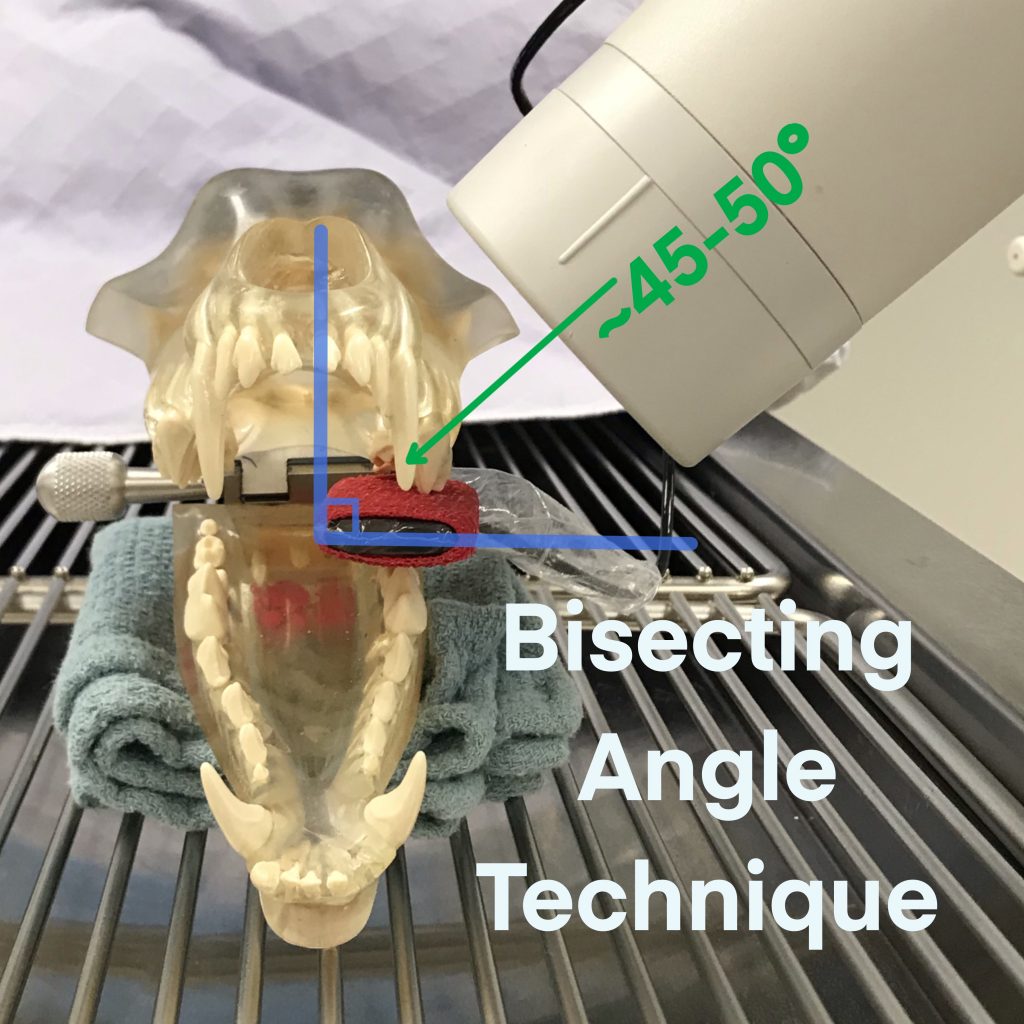
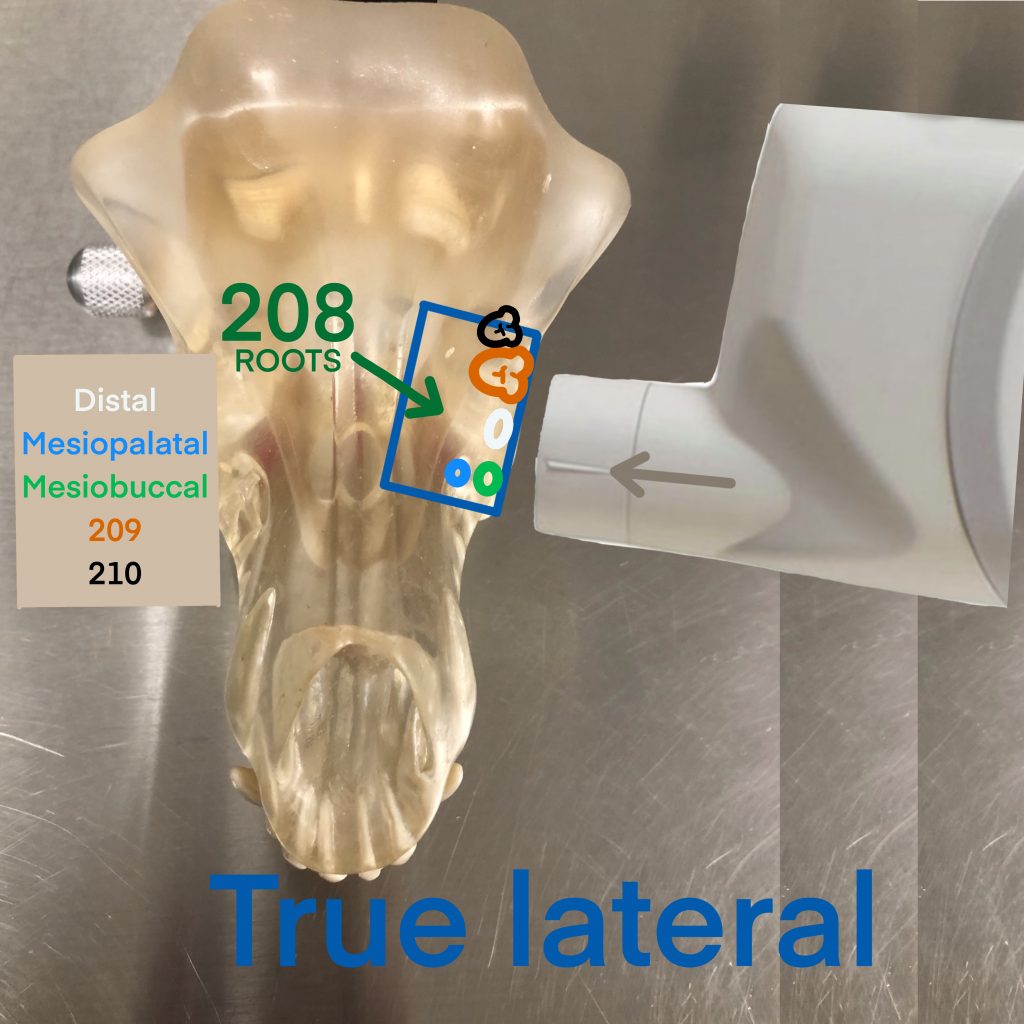
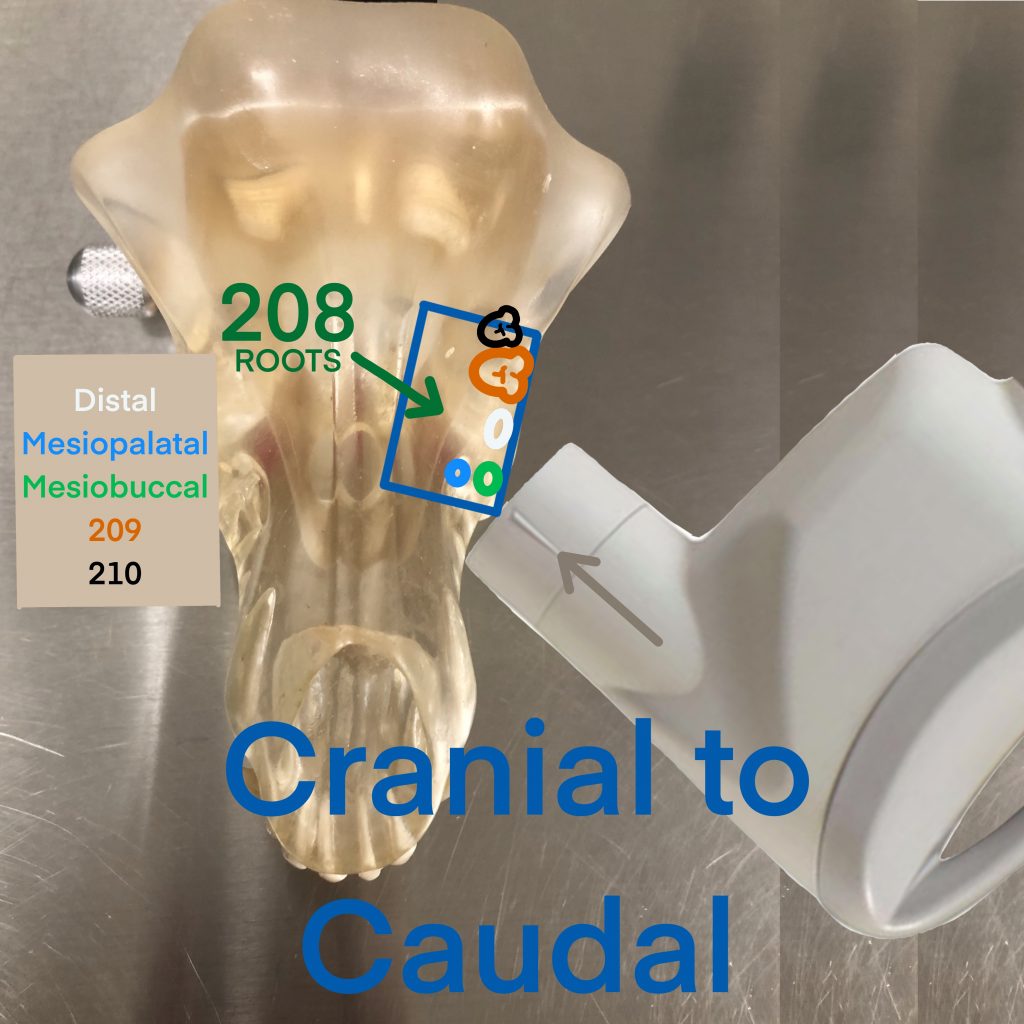
Since these teeth are 3 rooted, there is always some form a superimposition of the roots. Thus, it is generally impossible to evaluate all three roots in one image. Using an orthogonal angle technique is therefore needed to “split” roots apart for better evaluation. The article above describes the Bisecting Angle Technique (Figure 1) and what I call the true lateral shot (figure 2) which produces a great image of the distal root of 108 and 208, however the mesiobuccal and mesiopalatal roots are superimposed. To “split” these roots, the orthogonal adjustment to this technique is a cranial to caudal shot (Figure 3), and is performed as follows:
- Placement of the plate and the ~45-50° angle aim of the X-ray tube is the same. (Figure 1)
- The beam direction is changed by moving the cone to shoot in a cranial-caudal direction. (Figure 2)
- This will move the mesiopalatal root forward and the mesiobuccal root in the opposite direction. Additionally, you will find that the distal root is now superimposed over 109 or 209.
- We will demonstrate this in lab using your 3D teeth model.
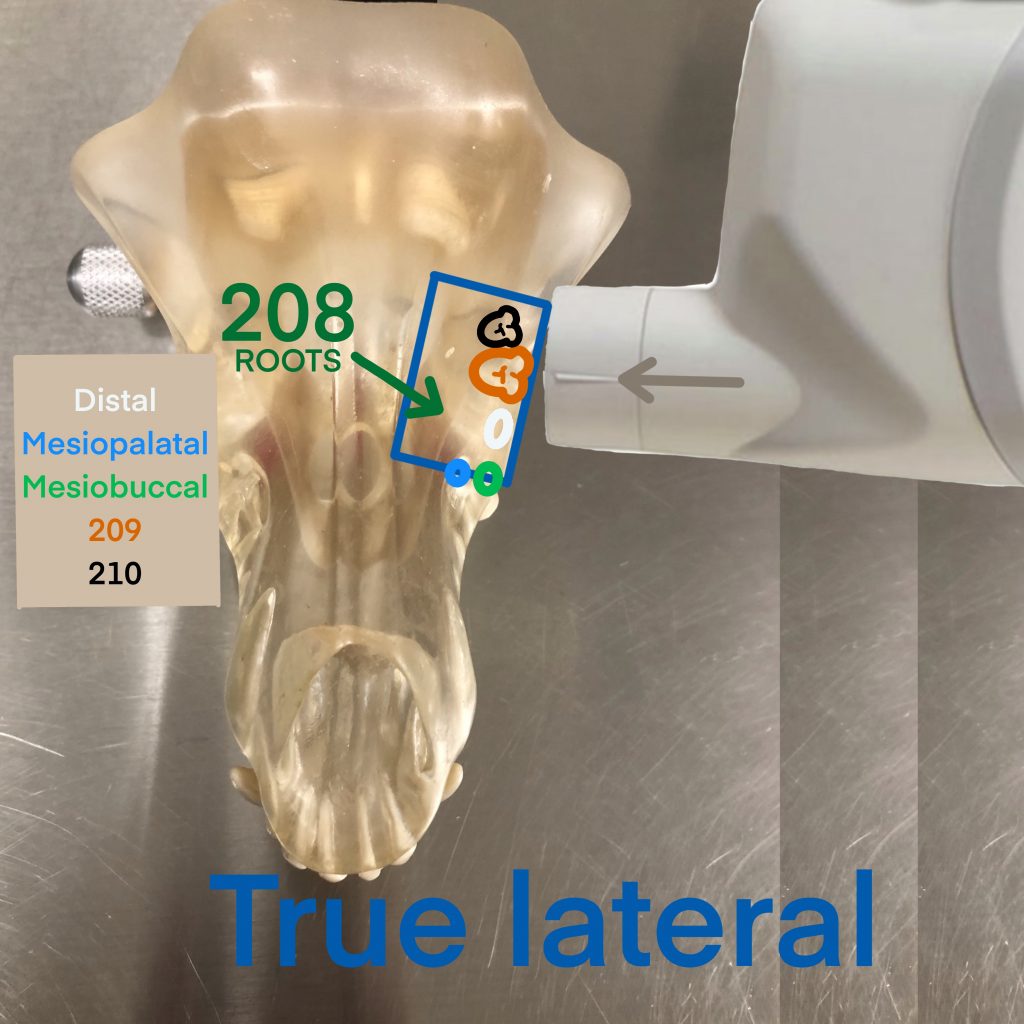
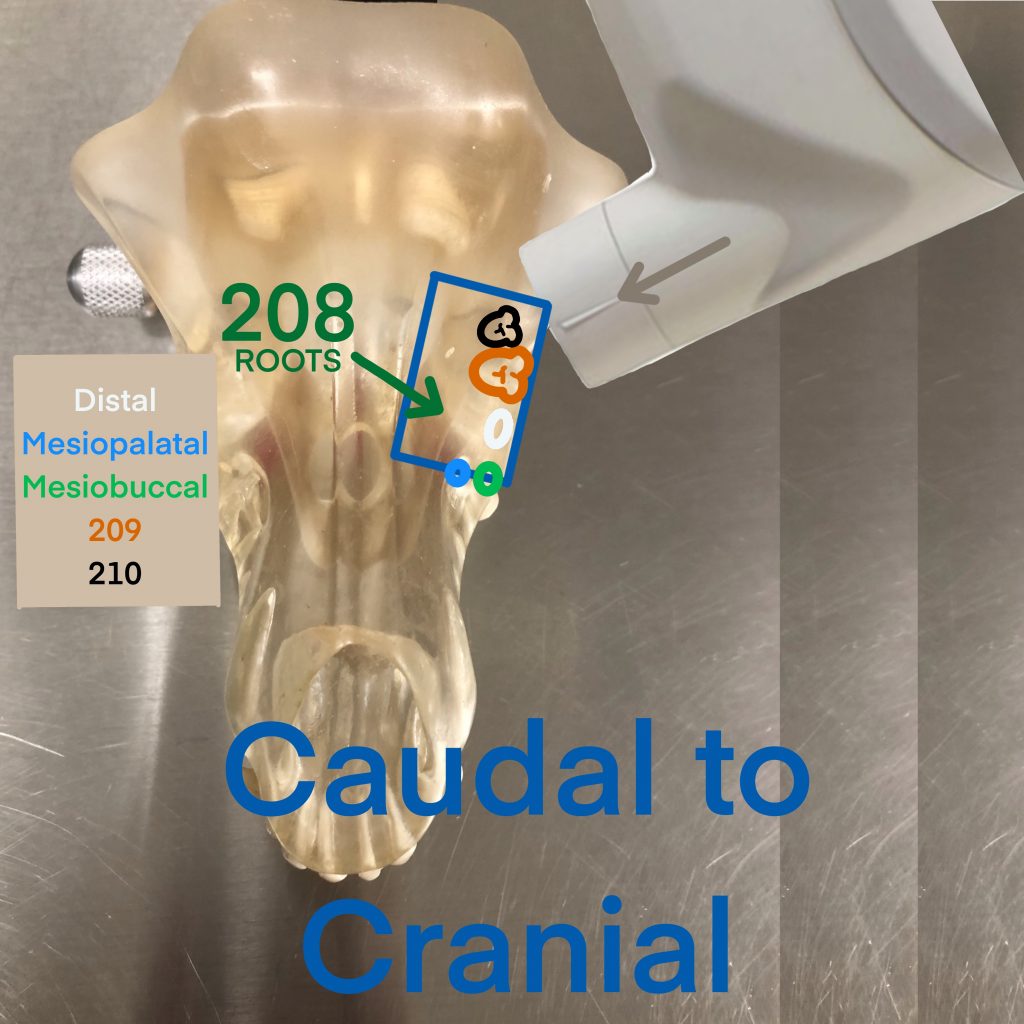
An additional technique can be used for the 109, 110 and 209, 210 teeth. For these teeth a true lateral shot (Figure 4) and a caudal to cranial shot (figure 5) are performed to acquire orthogonal views.
- Please note, in the OSU small animal dental clinic you will see some slight variations in this technique, mainly due to patient positioning. We traditionally perform our dental procedures with the patients in dorsal recumbency. We will then tilt the patient side to side in order to take radiographs of the right or left maxillary teeth. This avoids completely flipping the patient. Flipping the patient often results in the patient becoming light under anesthesia and often results in tangling of all the cords and tubes involved in anesthetic monitoring and therapeutic delivery.