Skill Group: Clinical Skills
Normal vs. Abnormal Findings
Before You Start …
Make sure that you have a good understanding of the dental formulas outlined in lesson 2 (“Modified Triadan System and Dental Formulas”), as well as normal anatomical structures outlined in lesson 3 (“Dental Anatomy”).
Introduction
As you learned in the previous lessons, charting the dental structures is one of the biggest steps in completing a comprehensive oral health assessment and treatment plan. This lesson is where we start to put all the information together – we will use our knowledge of normal dental formulas and dental anatomical structures to determine when and if abnormalities exist.
In veterinary dentistry, there are multiple pathologies found in our patients’ mouths. In this module we are going to cover many of the most common types of abnormal findings including abrasion, crowding, furcation exposure, mobility, oral masses, and crown fractures – both complicated and uncomplicated, as well as missing teeth.
Learning Outcomes
Identify common pathologies to include abrasion, crowding, furcation exposure, mobility, oral masses, crown fractures and missing teeth.
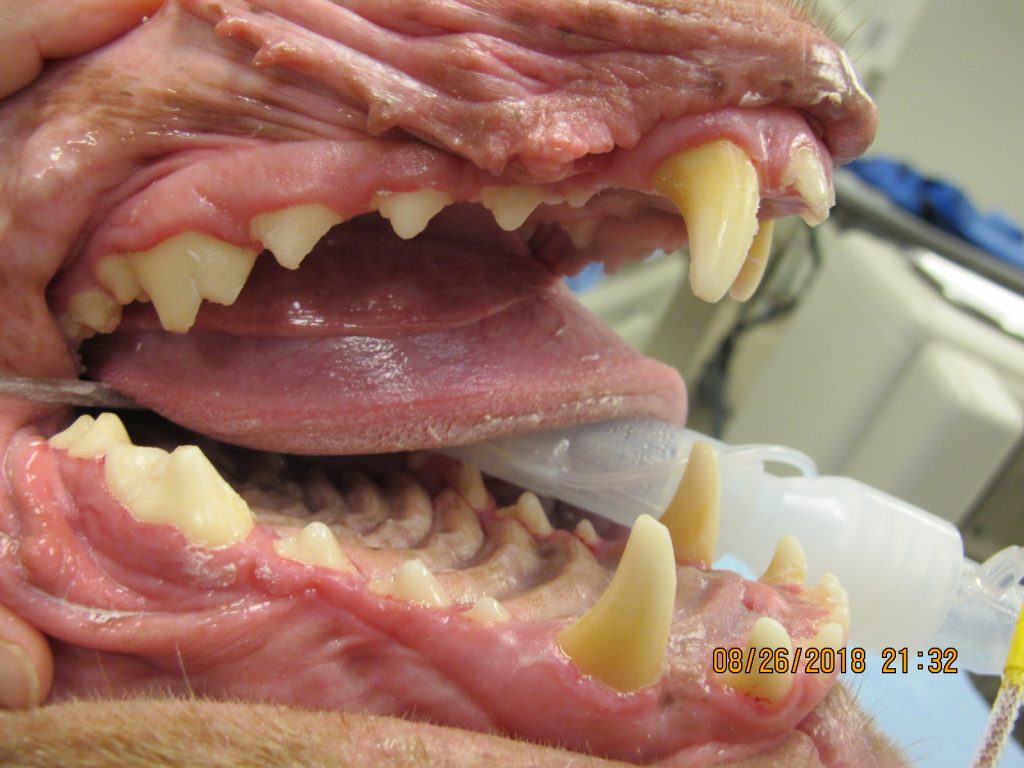
Normal Mouth
In a normal mouth, all teeth are present. There is room for each individual tooth to have a collar of gingiva surrounding it on all sides. The teeth are all pointed in the correct direction with the crowns curved slightly distally. Finally, there is no greater than 3 mm of depth in the gingival sulcus around any tooth in a dog and no greater than 0.5-1 mm in a cat – this will be covered in greater detail in a later lesson.
Abnormal Findings
Abrasion and Attrition
The entire enamel surface should be smooth and intact on each individual tooth. Sometimes the enamel and deeper structures can be disrupted by behaviors our patients display. Abrasion is the loss of hard tooth structures caused by mechanical forces other than tooth on tooth contact or chewing (mastication). Many of our patients like to chew on rocks, tennis balls, or even cage bars, which can ultimately damage their teeth by causing abrasion of the tooth surface. Abrasion should not be confused with attrition, which is another type of damage to the tooth surface caused by abnormal wear from tooth on tooth contact. This typically occurs in our patients when there is a tooth in an abnormal position.
Furcation Exposure
The furcation of a tooth is the anatomical location where the roots begin to separate in a multi-rooted tooth. This area is typically covered by the structures of the attachment apparatus including the gingiva, periodontal ligament and alveolar bone. When there has been an accumulation of tartar (calculus) in the gingival sulcus, it creates an inflammatory reaction that ultimately causes loss of the supporting structures. When this happens at the area of the furcation, it allows the furcation to become exposed to the oral cavity. This exposure is abnormal and will continue to allow tartar and foreign material including food and hair to become lodged in the furcation causing further damage and exposure. Furcation exposure is typically seen in 3 stages. Furcation exposure 1 is typically seen when there is less than 50% exposure under the crown with some alveolar bone and periodontal ligament still intact. Furcation exposure 2 is seen when there is 50% or great exposure under the crown, but not extending to the other side of the tooth. Furcation exposure 3 is seen when there is complete exposure of the furcation causing a through and through lesion.
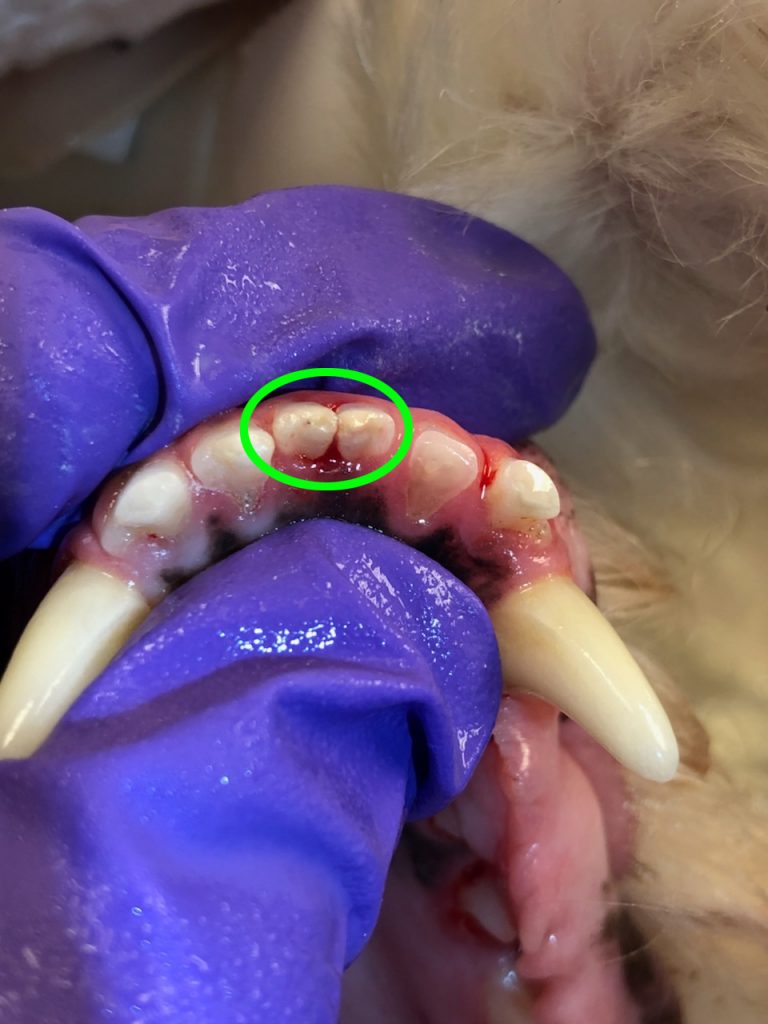
Crowding
Each tooth should be lined up along the long axis of the maxilla or mandible with an entire collar of gingiva surrounding all sides. If the teeth are abnormally situated, the teeth can touch and two or more adjacent teeth can share one collar of gingiva; these teeth are considered crowded. Crowding creates areas where food, debris, plaque and calculus can accumulate, creating inflammation and ultimately bone loss.
Mobility
Mobility is the medical term for a loose tooth. Due to the attachment apparatus, we previously discussed, each tooth should be firmly attached to its alveoli (tooth socket). If a tooth is mobile, it means the attachment apparatus has been damaged allowing the tooth to move within the socket. Mobility is typically seen in 3 stages. Mobility 1 is slight and occurs when there is movement in any direction other than axial of >0.2mm and up to 0.5mm. Mobility 2 is moderate and seen when there is 0.5 – 1.0 mm of movement. Mobility 3 is severe with any movement exceeding 1 mm or any axial movement.
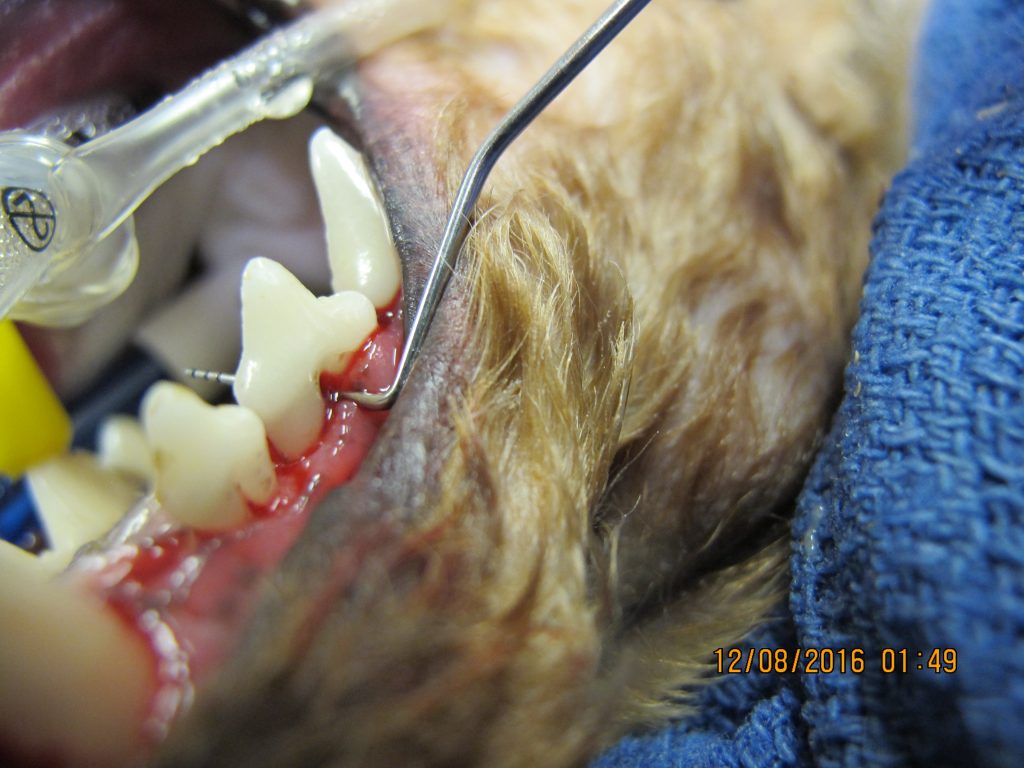
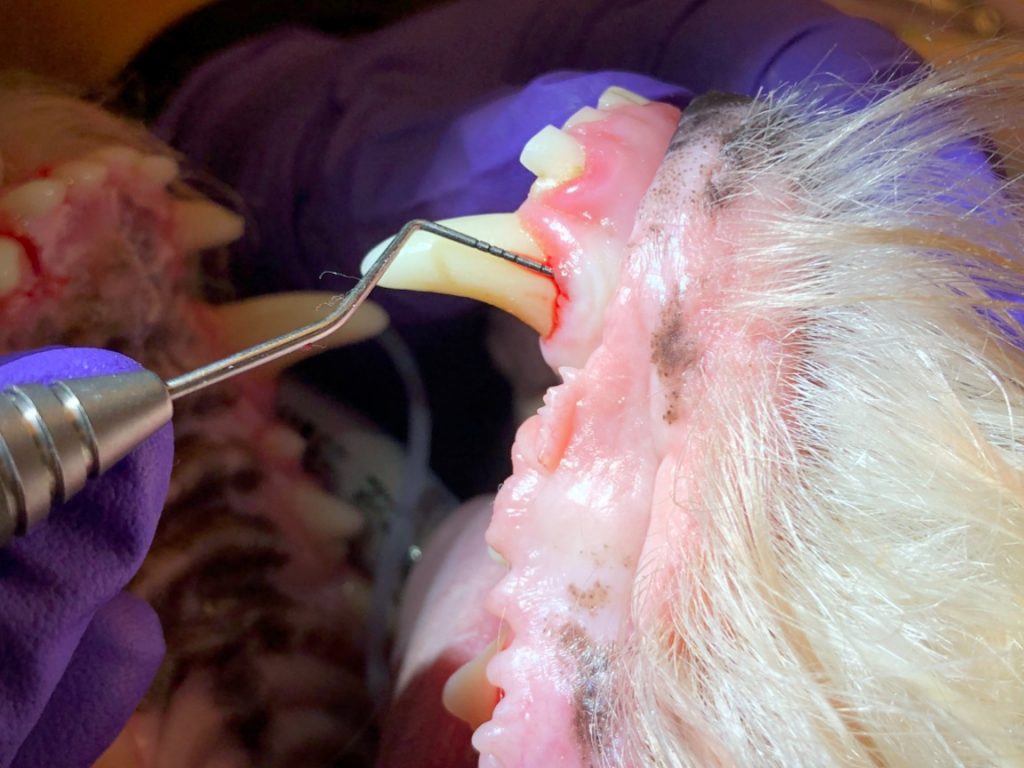
Abnormal Gingival Sulcus
We want to measure the gingival sulcus around each tooth. Normal depth of the gingival sulcus in dogs is up to 3 mm, while normal depth in cats is only 0.5-1 mm. We use the 6 point technique. This technique allows us to identify the depth of the gingival sulcus at 6 points around the tooth – mesial buccal/labial, buccal/labial, distal buccal/labial, distal lingual/palatal, lingual/palatal, distal lingual/palatal. This can be performed as shown below, gently placing the probe into the gingival sulcus to the depth of the epithelial attachment at the 6 points and retracting the probe between each point. Another variation is rather than completely removing the probe from beneath the gingiva 6 times, the probe can be placed beneath the gingiva with gentle pressure applied to assess the depth of the sulcus. The probe is then slightly withdrawn from the base of the sulcus and moved to the next point where gentle pressure is again applied. The probe is essentially “walked around” below the gumline. Leaving the probe at the full depth of the gingival sulcus could result in trauma to the tissue and should be avoided.
The 6-point technique allows us to identify the depth of the gingival sulcus at 6 points around the tooth – mesial buccal, buccal, distal buccal, distal lingual/palatal, lingual/palatal, distal lingual/palatal.
Oral Masses
An oral mass is defined as a lump in the oral cavity. For our purposes, we will specifically consider masses seen on or involving the gingiva surrounding the teeth. These masses are described via their appearance, location, and dimensions. Masses can be benign or malignant in nature. Biopsy and histopathology is recommended.
Crown Fractures
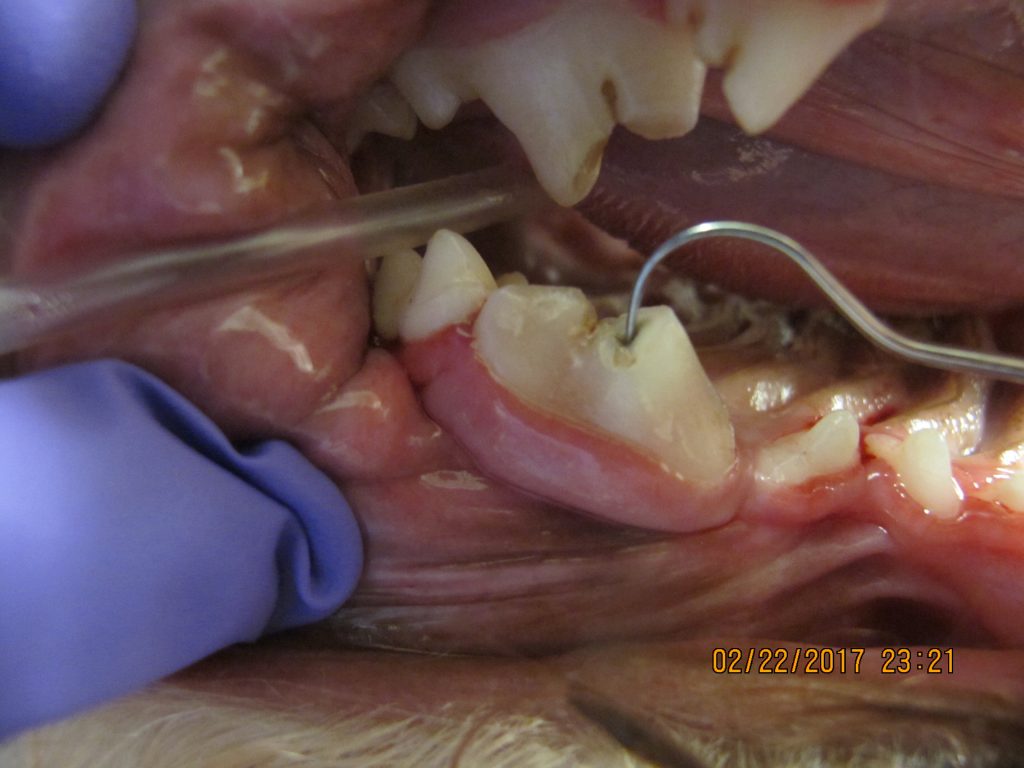
Crown fractures can occur anywhere on the crown of the tooth. These types of fractures involve only the crown and do not extend below the gum line into the root. There are 2 types of crown fractures: complicated and uncomplicated. The explorer is used to probe the fractured surface to determine which fracture type is present. Complicated Crown Fractures occur when there is a fracture in the crown of the tooth that results in exposure of the pulp cavity as evidenced by the explorer tip entering into the exposed pulp chamber. When there is a fracture in the crown of the tooth with no exposure of the pulp cavity, these are categorized as Uncomplicated Crown Fractures. The importance in knowing the difference comes in when we start to discuss treatment of these types of lesions. A slab fracture is a specific type of fracture where a slab of the tooth is broken or missing. Slab fractures should always be categorized as complicated or uncomplicated. In addition, a slab fracture has to be categorized to determine if only the crown is involved or if the crown and root have been impacted. In a later lesson, we will discuss crown/root and root fractures.
Missing Teeth
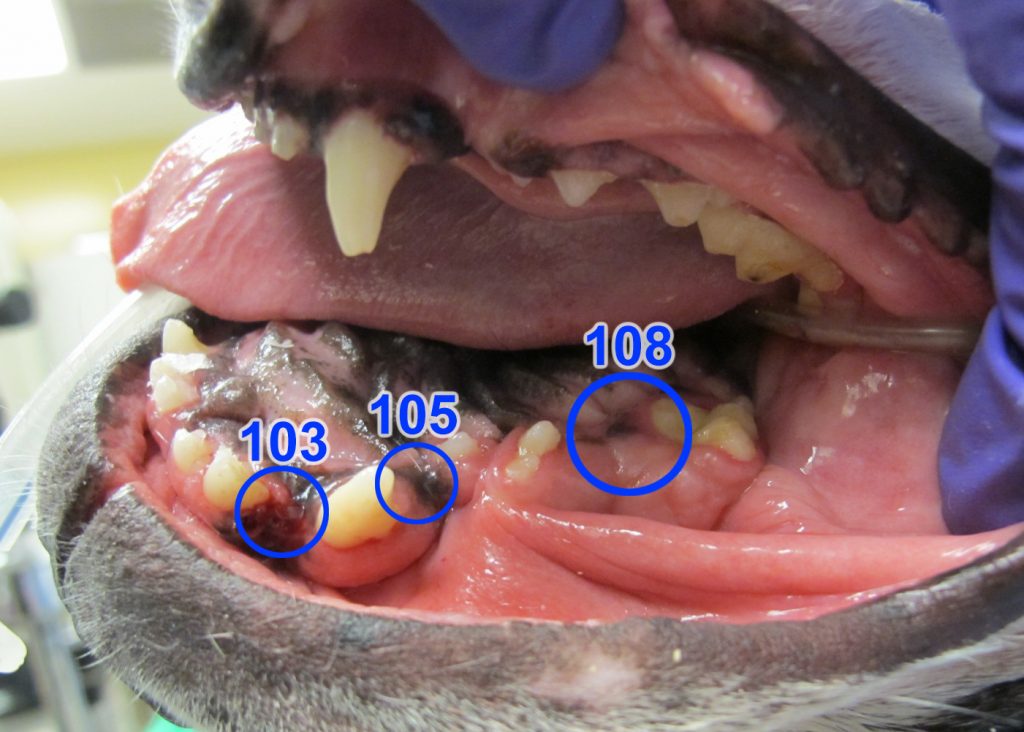
To determine if all teeth are present, you need to count each tooth in all 4 quadrants. If any tooth is missing, this is abnormal and requires further investigation.
Wrapping Up
In this lesson, you learned how to identify when and if basic abnormalities exist as you perform charting on your patient. In the next lesson, you will learn how to chart the dental structures in a systematic fashion.
Before Moving On …
Use the self-check activities below to practice identifying dental abnormalities.