Skill Group: Dermatology
Skill: Practice Skin Biopsy at Home
Before You Start …
Make sure you have the following equipment:
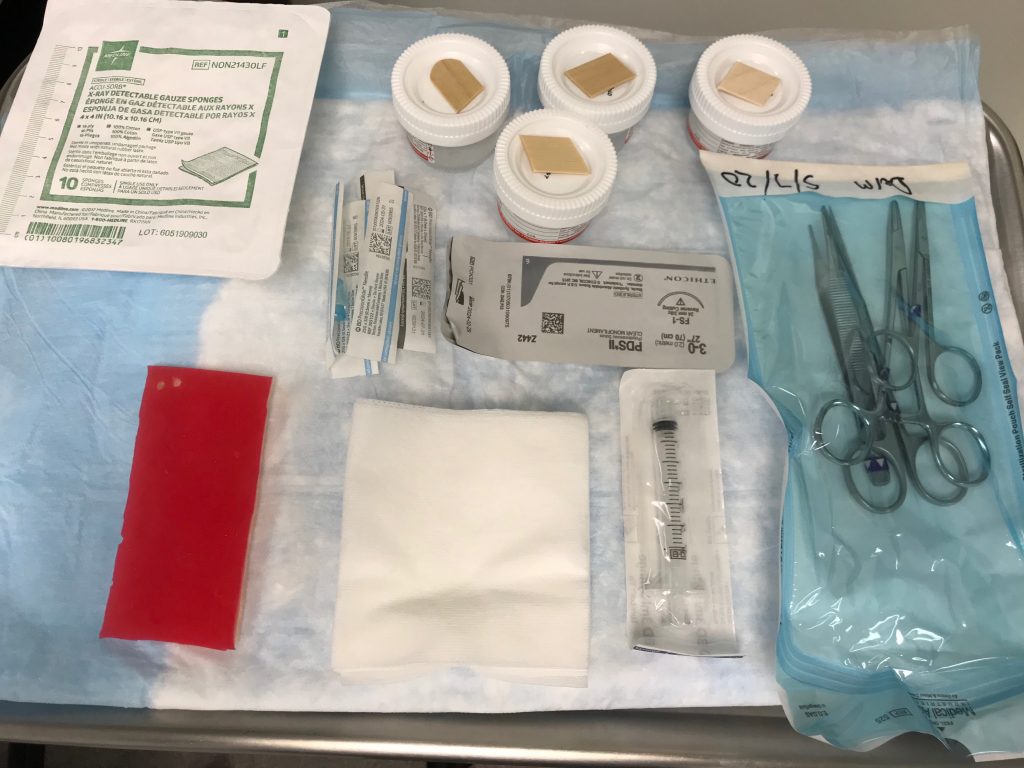
- Lidocaine 2% (replaced for water at home).
- Punch biopsies 2-8 mm depending on site of the biopsy and goal:
- Submitted for histopathology: use 4-6 or 8 mm.
- Submitted for bacterial or fungal culture: use a small 2-3.5 mm punch if the lesion is superficial, a larger 6 mm punch, and a double punch technique will give a better sample for deeper lesions.
- Gauze.
- 25 g needle and 3 cc syringes.
- Gloves.
- Iris scissors.
- Needle holder.
- Suture material.
- Specimen jar with 10% formalin (replaced for water at home).
- Sharpie marker.
- Skin simulator.
Introduction
(This resource was prepared by The Ohio State University College of Veterinary Medicine Dermatology and Otology Service. Faculty: Dr. Lynette Cole, Dr. Sandra Diaz, Dr. Wendy Lorch. Dermatology Resident: Dr. Dylan Burroughs. Technician: Deb Crosier, RVT)
Skin biopsy is a very useful diagnostic tool in veterinary dermatology. This guide will show you step by step how to perform a skin biopsy in a skin simulator.
Let’s do it!
Learning Outcomes
By the end of this lesson, you should be able to:
- Perform skin biopsy.
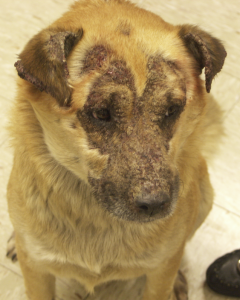
Review of Skin Lesions
Ideally, a primary lesion is chosen to be biopsied if present. The type of lesions to be sampled will depend on the clinical presentation. Primary lesions are the ideal to be sampled, but not always present. If no primary lesions are present, sample secondary lesions, ideally representing different stages of evolution, e.g. in a case of pemphigus foliaceus, the primary lesion is a pustule, but if not present, an intact crust can be sampled. If there are different lesions present, collecting a sample of each type of lesion will increase the chances of a diagnosis.
Primary lesions include the following: Macule/patch, Papule/plaque, Pustule, Vesicle/bullae, Wheal/angioedema, Nodule or mass, and Cyst.
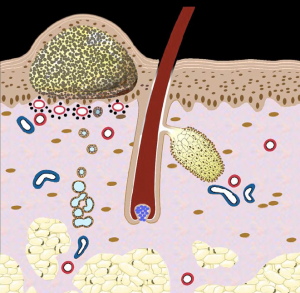
Some lesions may be either primary or secondary, including the following: Alopecia, Scale, Crust, Folicular cast, and Comedo.
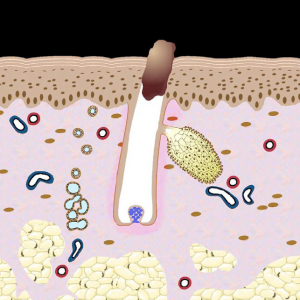
Secondary lesions include the following: Excoriation, Epidermal collarettes, Erosion/ulcer, Scar, Fissure, Lichenification, and Callus.
Technique
Step 1: Prepare for Skin Biopsy
The samples can be collected with a 4-8 mm punch after infiltrating the skin with a local anesthetic such as lidocaine. To perform the biopsy, the lesion to be sampled is selected, the hair can be gently clipped if needed with care to not touch the skin surface, the periphery of the lesion is marked with a permanent marker and infiltrate with 2% lidocaine.
(Video: Infiltrating the Skin with Lidocaine – the area to be biopsied has been selected and marked with a permanent marker. The lidocaine is injected in the subcutaneous tissue, not the dermis)
Step 2: Collecting the Sample
After preparations, allow enough time (at least 5 minutes) to reach full effect before beginning the biopsy.
The punch biopsy is slightly pressed against the skin and rotated in a clockwise motion to penetrate the full thickness of the skin. The punch is then removed to expose the sample and is generally adhered to the subcutaneous tissue. To collect the sample, the subcutaneous fat is cut carefully with an iris scissors and small forceps can be used to support the subcutaneous tissue. Care should be taken to not damage the sample with the forceps, as it can cause artifacts. Remove excess blood by gently blotting the sample with a piece of gauze.
(Video: Collecting the Punch Biopsy Sample – the patient is awake, the procedure was performed with local lidocaine. If a more sensitive area is being sampled, like the nose or paw pads, sedation or general anesthesia may be required.)
Step 3: Preserving the Sample
The sample is then placed in 10% formalin. The area can be closed with suture or staples. If small nodules that can be completely excised or deep lesions (e.g. panniculitis) are present, elliptical wedge biopsies are recommended.
Step 4: Suturing the Skin
The wound may be sutured. Use non-absorbable 3.0-4.0 suture material swaged onto a cutting or reverse cutting needle. Acceptable suture non-absorbable monofilament suture for skin is nylon or polypropylene as they stimulate less tissue reaction, are less traumatic, and may provide a better cosmetic result. If non-absorbable monofilament suture is not available, absorbable suture can be used. Place one, two, or three simple interrupted sutures, depending on the size and the location of the defect. For an area measuring 4 to 5 mm, place one to 2 simple interrupted or cruciate sutures. Sutures should be placed perpendicular to the long axis of the punch defect or perpendicular to the skin tension lines.
(Video: Cruciate Suture Pattern)
Don’t’s
- Don’t surgically prepare the site if lesions are in the epidermis or dermis.
- Don’t use electrocautery or laser for small biopsy samples.
- Don’t biopsy the center of an ulcer.
- Don’t grasp the punch biopsy samples or lesion areas of samples with tissue forceps.
- Don’t’ use a biopsy instrument that is too small (4 mm is the minimum useful diameter).
- Don’t use dull or previously used punch biopsy instruments as these will shear and distort tissue and create artifacts.
Wrapping Up
You are now able to perform skin biopsy. We hope you have enjoyed learning how to collect and practicing collecting a biopsy sample!
If you need to review suture patterns, please visit the following sites:
- VIDEO: “CSL: Cruciate suture pattern” by TiHoVideos
- Suturing techniques and common surgical procedures by Veterian Key
- VIDEO: “How to take a skin biopsy -Veterinary” by Independent Veterinary Pathology
- VIDEO: “Dermatology – Lesion Terminology” by Armando Hasudungan
Before Moving On …
When you have mastered the biopsy procedure, video yourself collecting a biopsy sample from your skin simulator and submit it for feedback.